Unlike joining a meeting, you must have a Zoom account in order to be the host. If you need help setting up an account, watch the video above or re-visit the first lesson, Getting Started.
While downloading the app is optional, doing so gives you additional features. This might be a good idea if you plan on using Zoom regularly; otherwise you can join/host through your web browser.
Let's talk about how to host a meeting, as well as a few measures you can take to make them more secure.
Creating a meeting, inviting participants
We'll cover the steps for how to create a meeting and invite participants (1) through your web browser and (2) through the app. The steps are similar, but the user interface looks a little different.
Through your browser (without the app)...
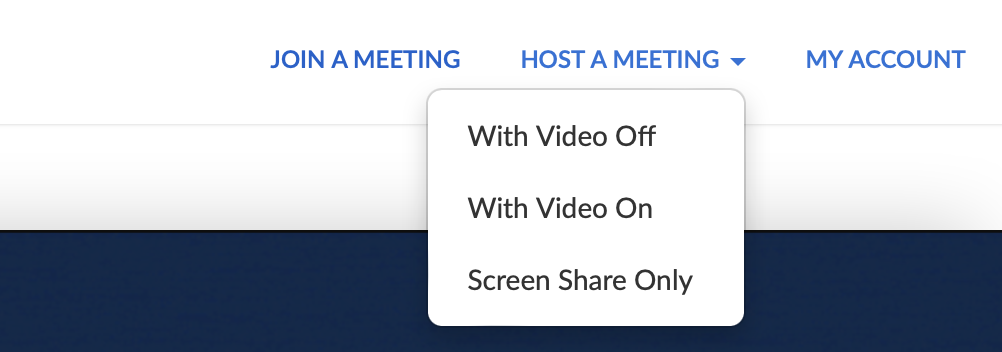
Go to zoom.us and click Host a Meeting on the top right-hand side of the main page. A drop-down menu will appear. Select if you want to host With Video On, With Video Off, or Screen Share Only.
On the sign-in page, enter your email address and password. Then click the blue button that says Sign In. You can also sign in through SSO (Single Sign-On), your Google account, or your Facebook account.
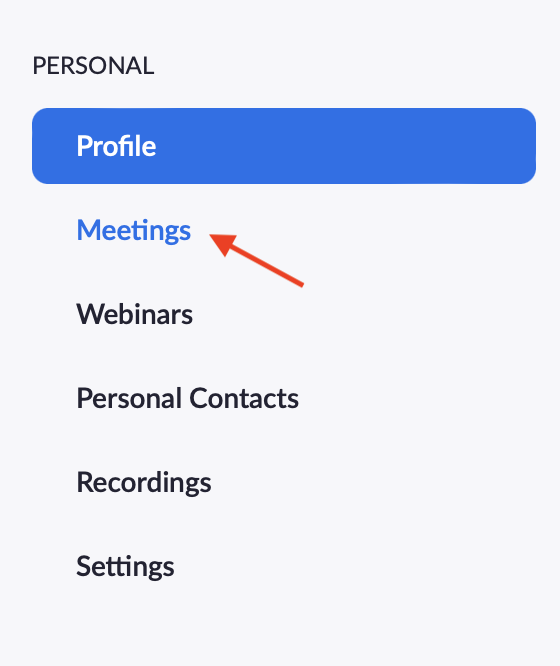
This will bring you to your profile page. Click Meetings on the left-hand side.
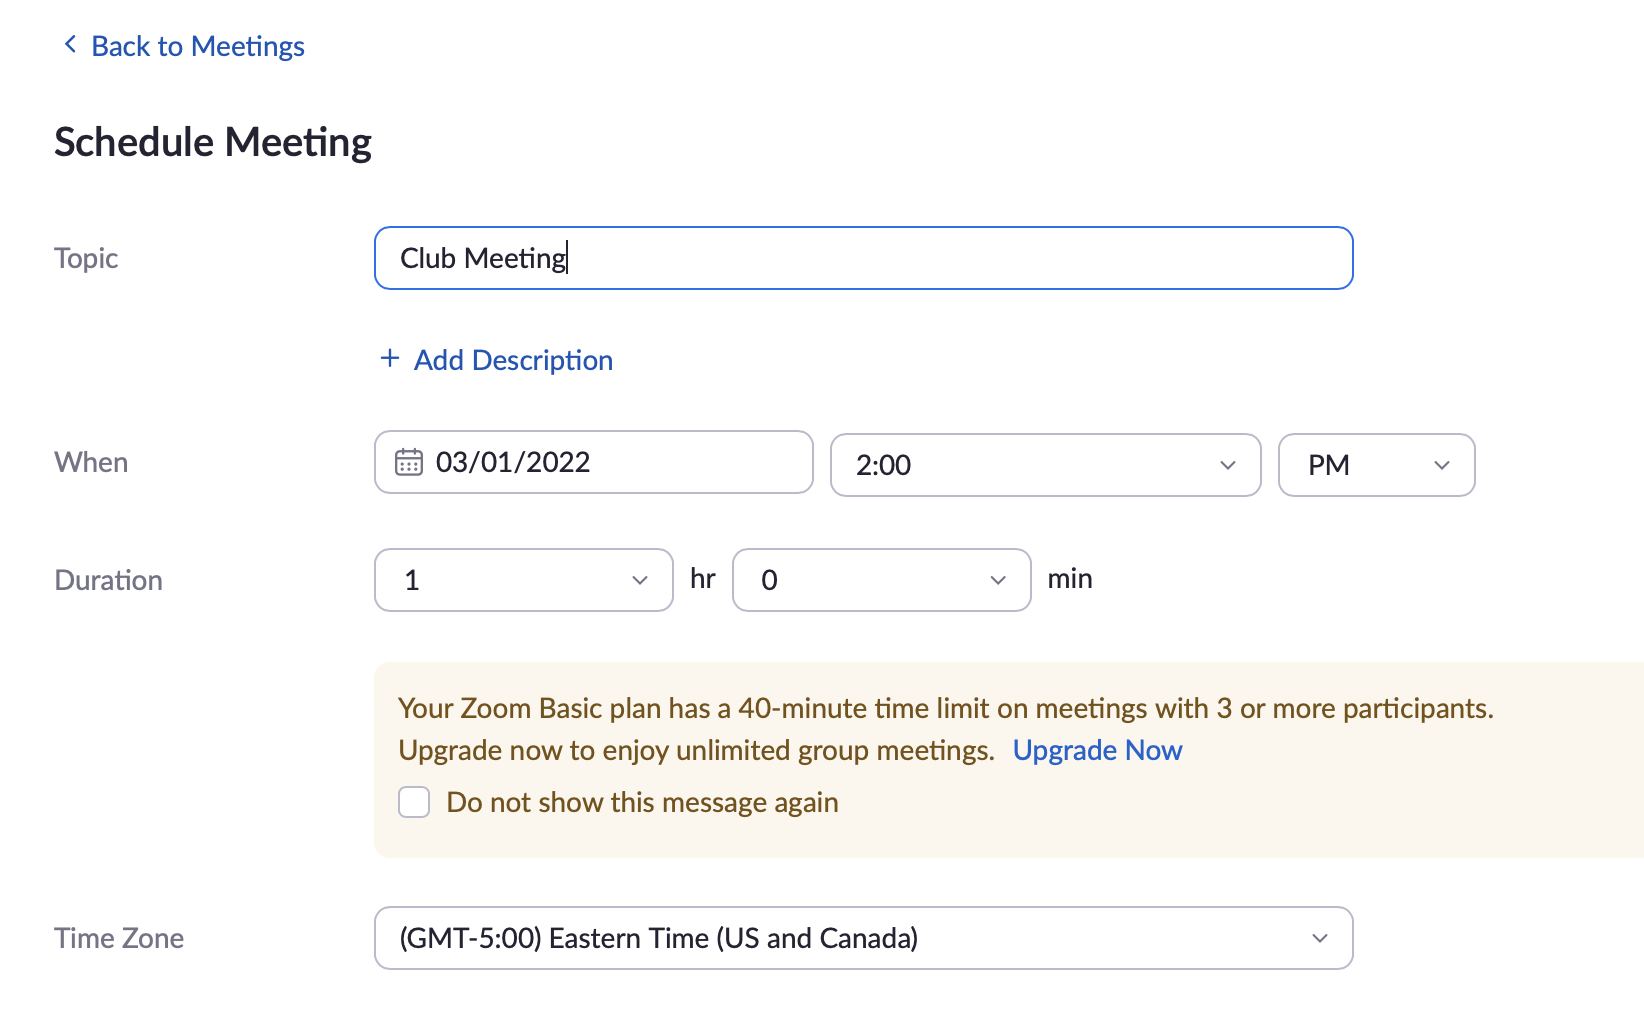
Click the white button that says Schedule a Meeting on the right-hand side. Now you can enter the topic, date, and time of your meeting.
You can choose to GenerateAutomatically a new meeting ID, or use your Personal Meeting ID (which is connected to your Zoom account). Sometimes people like to use the second option if they plan on holding a recurring meeting.
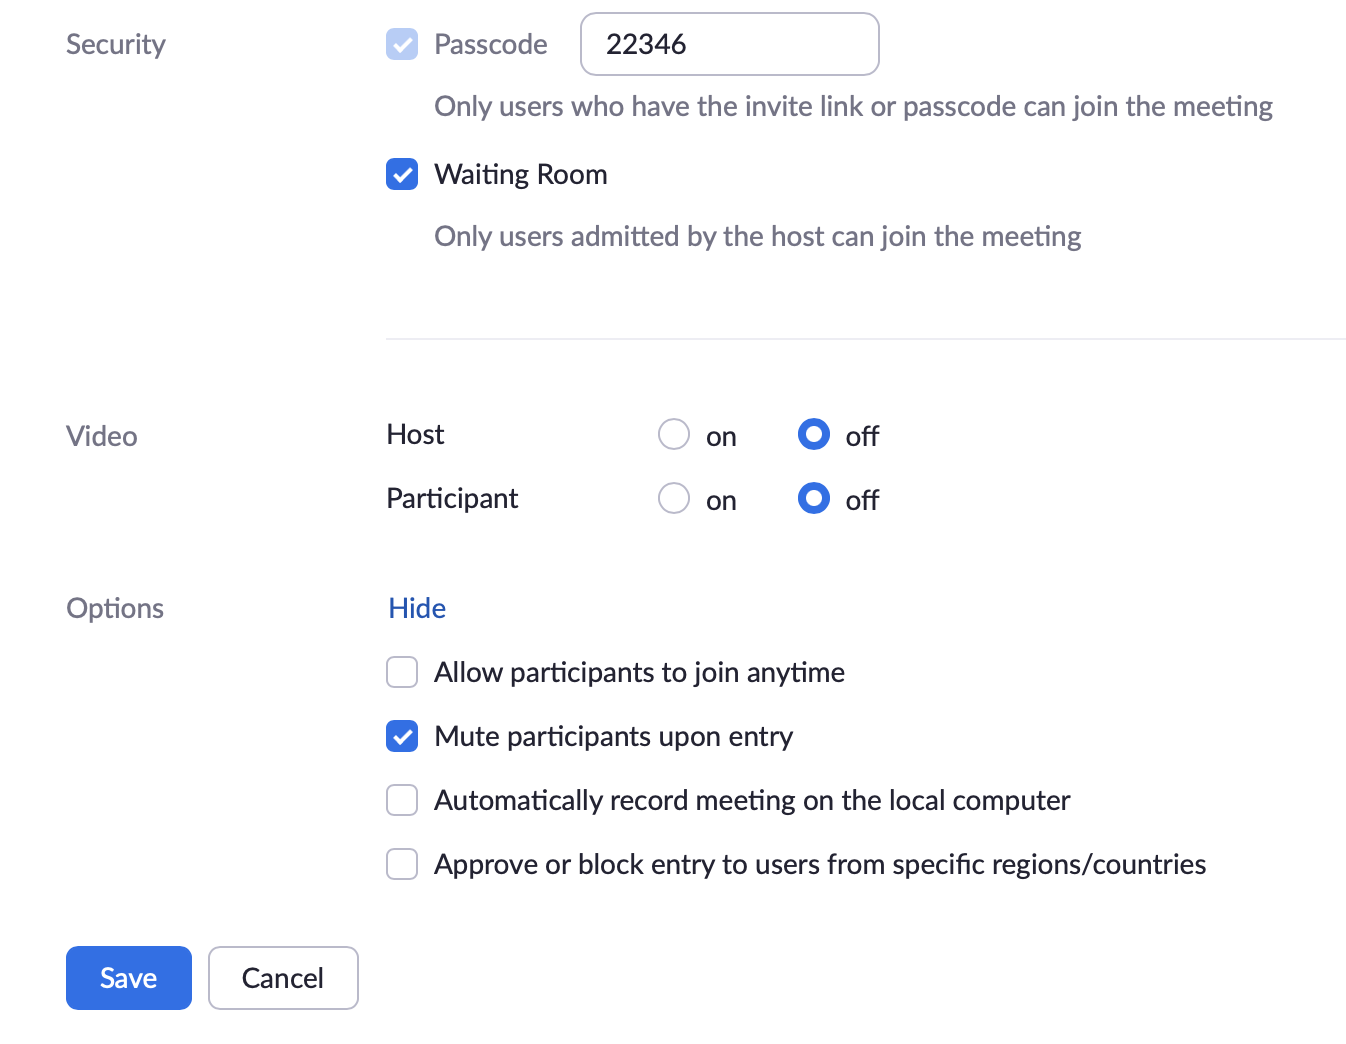
A passcode is now required for all meetings. Tick the box for a Waiting Room if you want to let your participants in one-by-one. You can also decide if you and your participants will be joining with video on or off.
To see additional options, click Show next to Options. Then click Save.
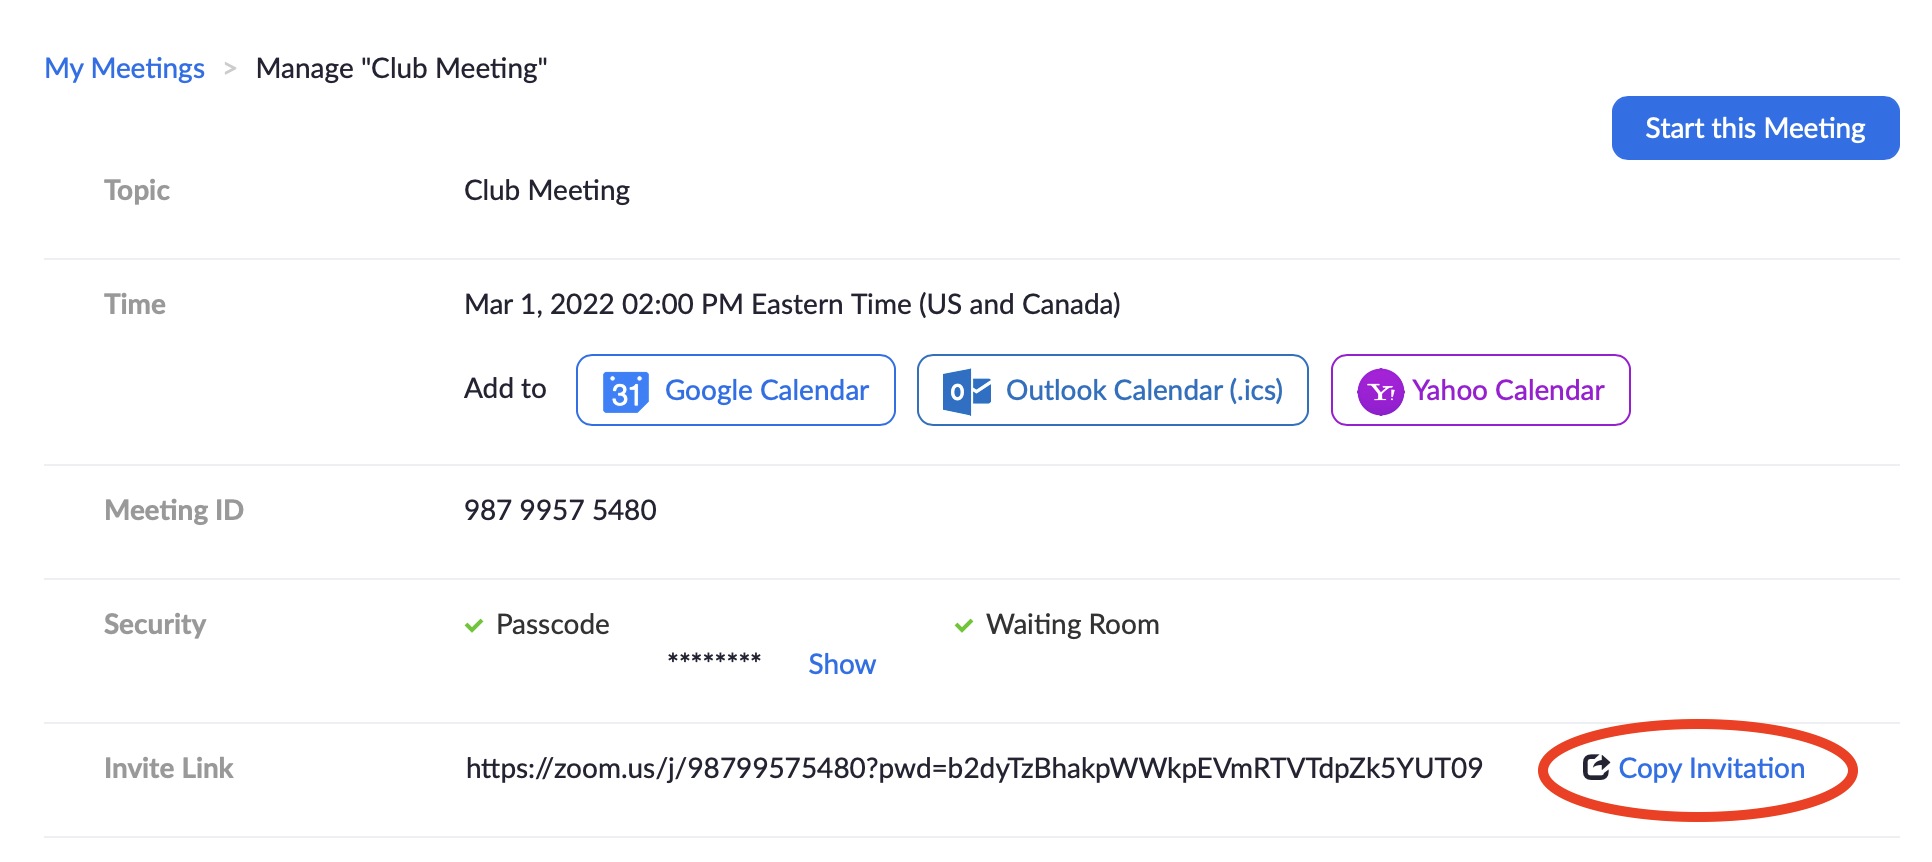
Scroll up to the Invite Link. Click Copy Invitation on the right-hand side.
In the dialog box, click Copy Meeting Invitation. You should see a green pop-up which says "Copied to clipboard." Then paste this invitation in your email to participants.
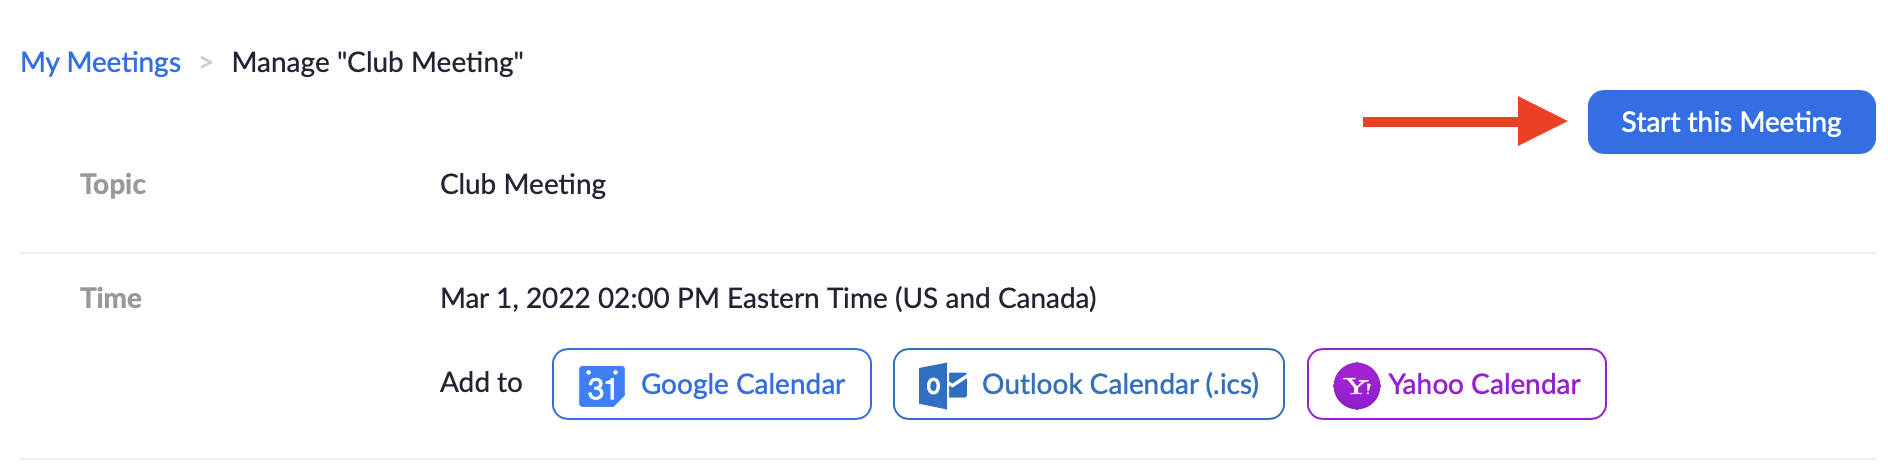
Once you have emailed the invite, you can wait until the scheduled time, or return to the Meetings page and click the blue button on the right-hand side that says Start this Meeting.
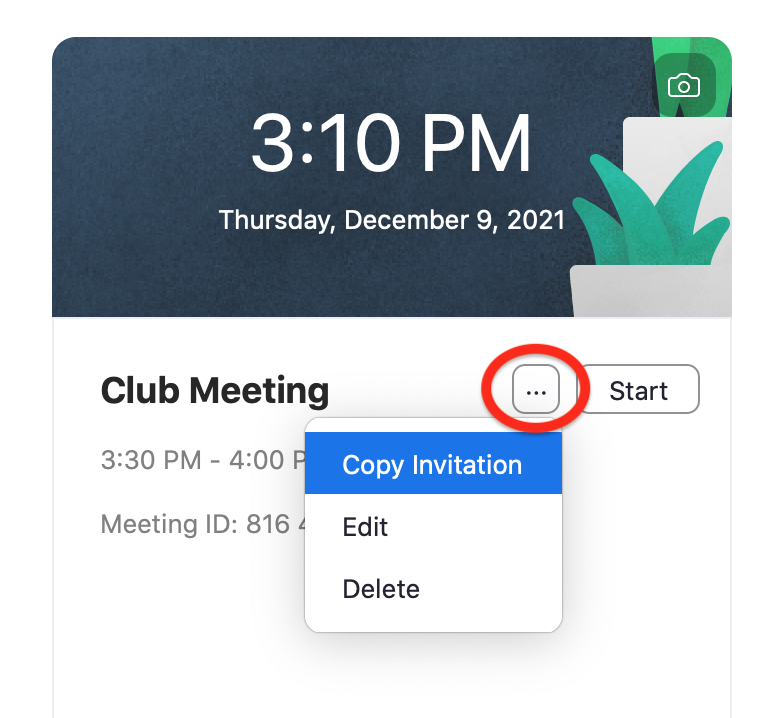
Through the app...
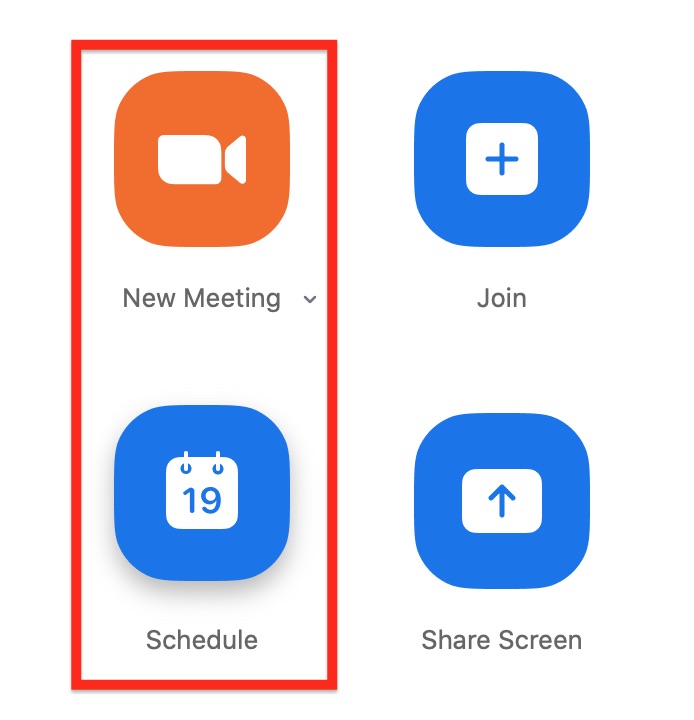
Log into the app from your phone or computer. On the app's main screen, you can either start a meeting right away by clicking the orange New Meeting button, or schedule a meeting by clicking the blue Schedule button.
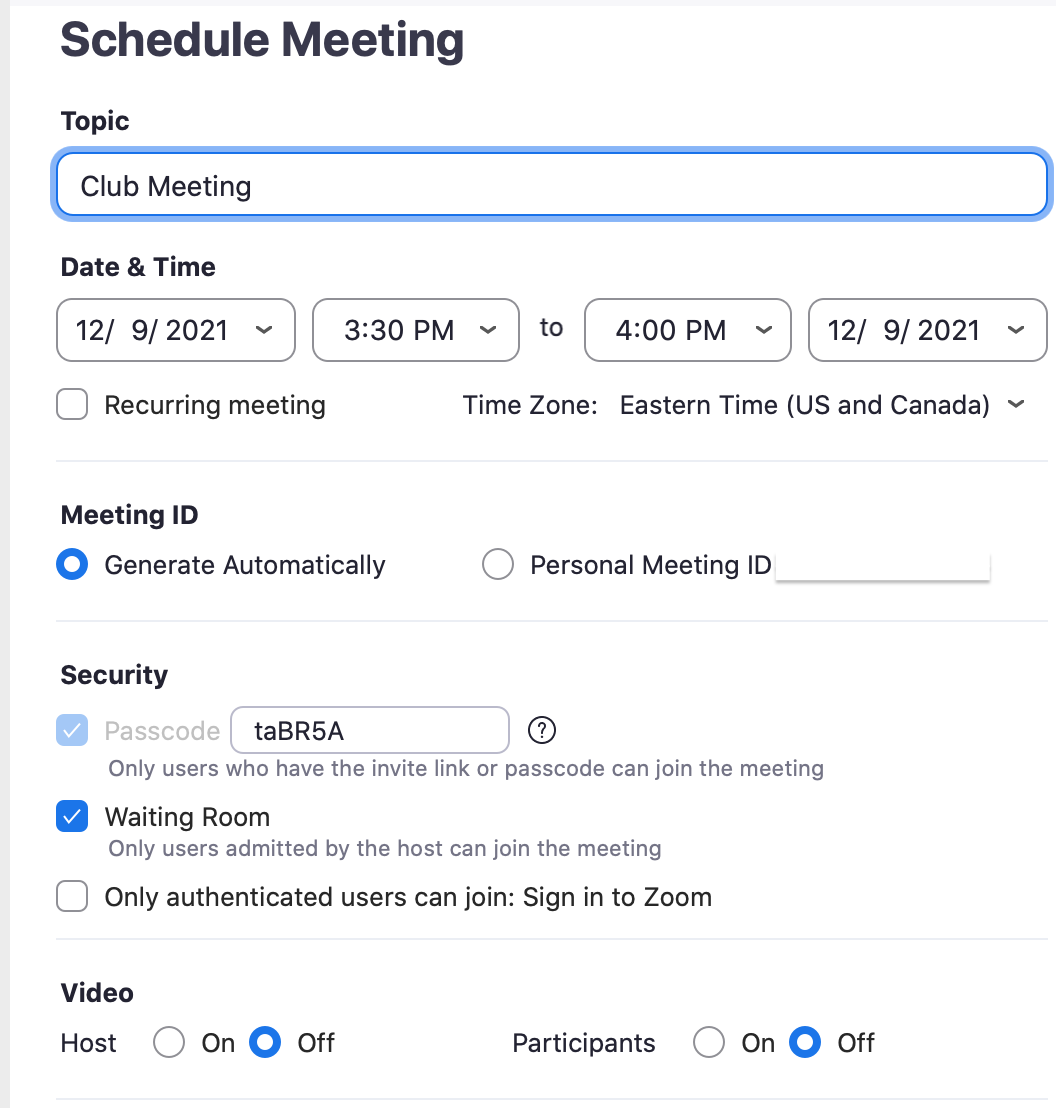
Let's assume you are scheduling a meeting. You can type the Topic, then select a Date & Time. You can also choose if you want to use a new Meeting ID or a personal one (which stays connected to your account), as well as your Security and Video preferences.
In order to invite participants, return to the app's main screen. Click on the three dots (...) next to the topic of your meeting. In the drop-down menu, click Copy Invitation. This will copy the invitation to your clipboard, which you can paste in an email to your participants. Then click the white button which says Start when you're ready to begin.
How to better secure your meetings
One of Zoom's biggest issues is called "zoombombing." This is where uninvited users find a way into meetings and try to disrupt them, often by showing offensive material. To combat these trolls, the creators of Zoom added several security updates, such as requiring meeting passcodes by default.
Although Zoom aims to be user-friendly, you’ll still need to take some precautions. Here are a few settings you can control as the host:
Waiting Room: The Waiting Room makes it so that participants cannot enter the meeting until the host approves them. This can help you filter out uninvited guests and control the flow of users. You can enable or disable the Waiting Room by clicking Security and selecting Enable Waiting Room.
If you have enabled the Waiting Room, don't forget to let your invited guests enter! Once you have joined the Zoom meeting, click Manage Participants. You can then choose who to admit or click Admit All. Of course, make sure you know who the users are before you admit them.
Screen Sharing Restrictions: Screen sharing lets a participant display the contents of their screen to the entire meeting. However, trolls often take advantage of this feature and try to cause chaos. To restrict screen sharing, click the arrow beside Share Screen, and select Advanced Sharing Options. Under the question “Who can share?” select Only Host.
Remove Unwanted Guests: You can kick a participant out of your meeting if you need to. Hover over their name, click More, and select Remove. By default, that participant will also not be able to rejoin the meeting.
Lock the Meeting: If you don’t want anyone else to join your meeting, you can lock it and keep newcomers out. Just click Security, then select Lock Meeting. You can unlock the meeting using the same method.
Learning how to use these features can help keep your experience a positive one. But even if there aren't any zoombombers, there can still be unintended distractions which negatively affect the quality of your meeting time.
In the next lesson, we'll discuss some helpful tips for running productive meetings in Zoom.