
Word 2013 -
Columns

Word 2013
Columns

search
menu
/en/word2013/breaks/content/
Sometimes the information you include in your document is best displayed in columns. Not only can columns help improve readability, but some types of documents—like newspaper articles, newsletters, and flyers—are often written in column format. Word also allows you to adjust your columns by adding column breaks.
Optional: Download our practice document.
 Selecting text to format
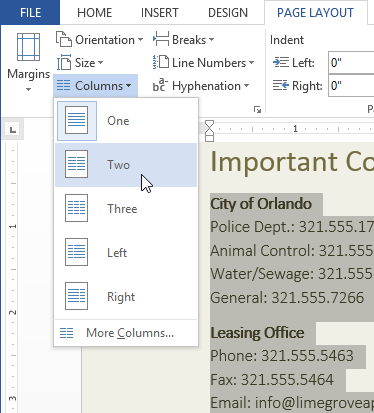 Formatting text into columns
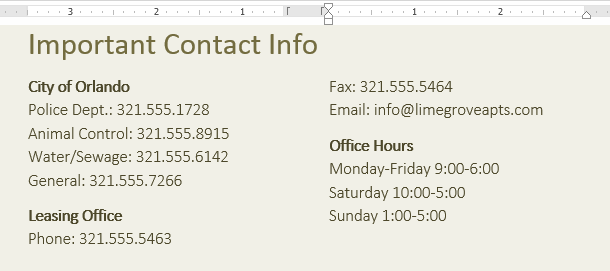 The formatted text
To remove column formatting, place the insertion point anywhere in the columns, then click the Columns command on the Page Layout tab. Select One from the drop-down menu that appears.
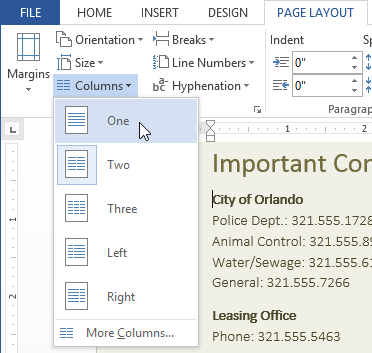 Removing column formatting
Your column choices aren't limited to the drop-down menu that appears. Select More Columns... at the bottom of the menu to access the Columns dialog box. Click the arrows next to the Number of columns: to adjust the number of columns.
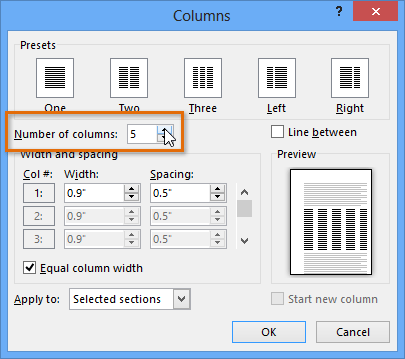 The Columns dialog box
If you want to adjust the spacing and alignment of columns, click, hold, and drag the indent markers on the Ruler until the columns appear the way you want.
 Adjusting the column
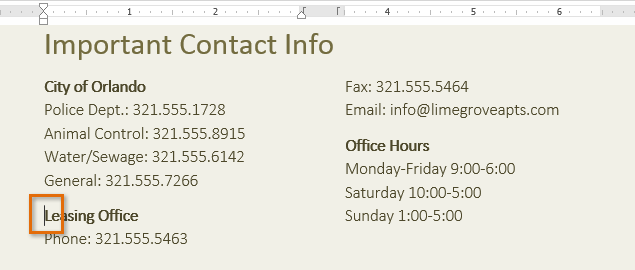
Once you've created columns, the text will automatically flow from one column to the next. Sometimes, though, you may want to control exactly where each column begins. You can do this by creating a column break.
In our example below, we'll add a column break that will move text to the beginning of the next column.
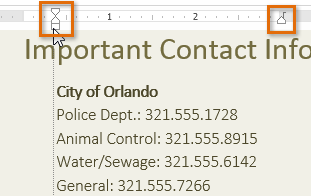
 Placing the insertion point
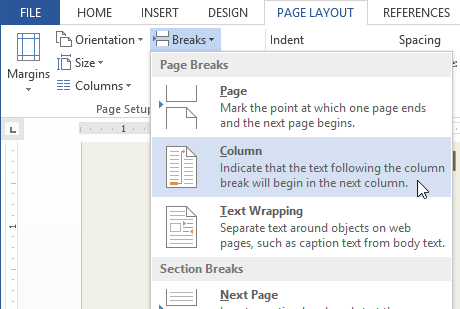 Adding a column break
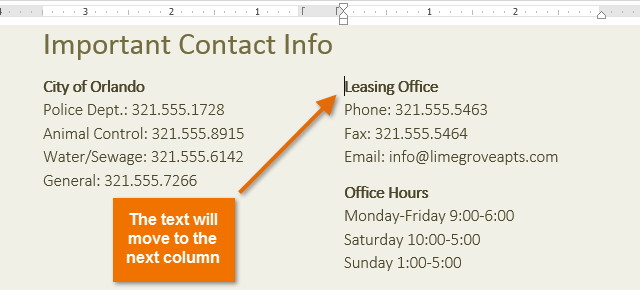 After adding a column break
To learn more about adding breaks to your document, visit our lesson on Breaks.
/en/word2013/headers-footers-and-page-numbers/content/