Lesson 19: Grouping and Ungrouping Objects on a Slide
/en/powerpoint2003/compressing-pictures/content/
Introduction
By the end of this module, you should be able to:
- Group objects on a slide
- Ungroup objects on a slide
Grouping and ungrouping objects
You can choose to use pictures, shapes, diagrams, text, and other objects in your PowerPoint presentation. If you do, there may be instances where you would like to group several of these objects together to make it easier to move them to different locations on the slide. This is called grouping.
To group objects:
- Select the first object with your mouse.
- Press and hold the Ctrl key on your keyboard. (You will have to hold the Ctrl key until you select all of the objects you would like to group.)
- Select the second object with your mouse.
- Continue to select all objects you would like to group.
- Release the Ctrl key.
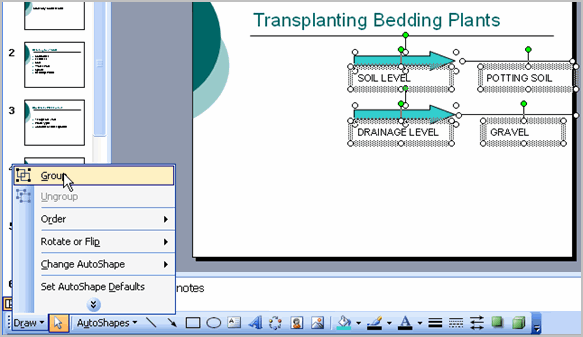
- Click the Draw menu.

- Select Group. A single set of handles will appear around the grouped object.
To ungroup objects:
- Select the object with your mouse.
- Click the Draw menu.
- Select Ungroup. A set of handles will appear around each object.
Challenge!
- Open a new blank presentation.
- Insert a picture from the clip art gallery.
- Insert an arrow or other drawing object.
- Insert a text box.
- Enter text into the text box.
- Group the text box, arrow, and clip art.
- Move the object to the center of the slide.
- Ungroup the object.
- Close the presentation without saving the file.
/en/powerpoint2003/ordering-objects-on-a-slide/content/


