Excel 2013: Getting Started with Excel

Lesson 4: Getting Started with Excel

/en/excel2013/understanding-office-365/content/

Introduction

Excel 2013 is a spreadsheet program that allows you to store, organize, and analyze information. While you may believe Excel is only used by certain people to process complicated data, anyone can learn how to take advantage of the program's powerful features. Whether you're keeping a budget, organizing a training log, or creating an invoice, Excel makes it easy to work with different types of data.

Getting to know Excel 2013

Excel 2013 is similar to Excel 2010. If you've previously used Excel 2010, Excel 2013 should feel familiar. If you are new to Excel or have more experience with older versions, you should first take some time to become familiar with the Excel 2013 interface.

The Excel interface

When you open Excel 2013 for the first time, the Excel Start Screen will appear. From here, you'll be able to create a new workbook, choose a template, and access your recently edited workbooks.

  • From the Excel Start Screen, locate and select Blank workbook to access the Excel interface.
    Screenshot of Excel 2013
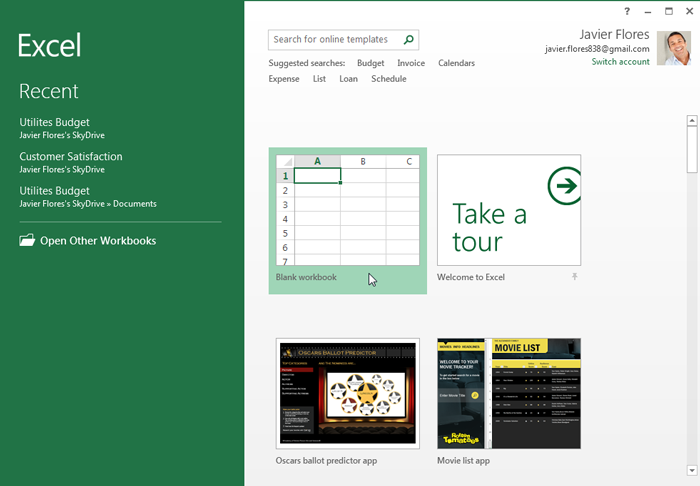
The Excel Start Screen

Click the buttons in the interactive below to become familiar with the Excel 2013 interface.

doneedit hotspots


Quick Access Toolbar

The Quick Access Toolbar lets you access common commands no matter which tab is selected. You can customize the commands depending on your preference.

The Ribbon

The Ribbon contains all of the commands you will need to perform common tasks in Excel. It has multiple tabs, each with several groups of commands.

Microsoft Account

From here, you can access your Microsoft account information, view your profile, and switch accounts.

Name Box

The Name box displays the location, or name, of a selected cell.

Formula Bar

In the formula bar, you can enter or edit data, a formula, or a function that will appear in a specific cell.

Column

A column is a group of cells that runs from the top of the page to the bottom. In Excel, columns are identified by letters.

Cell

Each rectangle in a workbook is called a cell. A cell is the intersection of a row and a column. Simply click to select a cell.

Row

A row is a group of cells that runs from the left of the page to the right. In Excel, rows are identified by numbers.

Worksheets

Excel files are called workbooks. Each workbook holds one or more worksheets. Click the tabs to switch between them, or right-click for more options.

Vertical and Horizontal Scroll Bars

The scroll bars allow you to scroll up and down or side to side. To do this, click and drag the vertical or horizontal scroll bar.

Worksheet View Options

There are three ways to view a worksheet. Simply click a command to select the desired view.

Zoom Control

Click and drag the slider to use the zoom control. The number to the right of the slider reflects the zoom percentage.

Working with the Excel environment

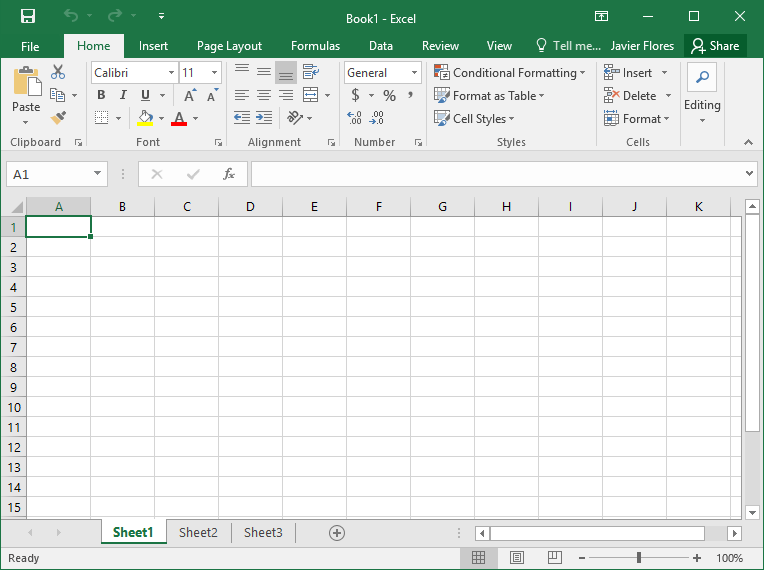
If you've previously used Excel 2010 or 2007, Excel 2013 will feel familiar. It continues to use features like the Ribbon and Quick Access toolbar, where you will find commands to perform common tasks in Excel, as well as Backstage view.

The Ribbon

Excel 2013 uses a tabbed Ribbon system instead of traditional menus. The Ribbon contains multiple tabs, each with several groups of commands. You will use these tabs to perform the most common tasks in Excel.

Click the arrows in the slideshow below to learn more about the different commands available within each tab on the Ribbon.

View the slides below to learn more about the different commands available within each tab on the Ribbon.

  • Screenshot of Excel 2013

    The Home tab gives you access to some of the most commonly used commands for working with data in Excel 2013, including copying and pasting, formatting, and number styles. The Home tab is selected by default whenever you open Excel.

  • Screenshot of Excel 2013

    The Insert tab allows you to insert charts, tables, sparklines, filters, and more, which can help you visualize and communicate your workbook data graphically.

  • Screenshot of Excel 2013

    The Page Layout tab allows you to change the print formatting of your workbook, including margin width, page orientation, and themes. These commands will be especially helpful when preparing to print a workbook.

  • Screenshot of Excel 2013

    The Formulas tab gives you access to the most commonly used functions and formulas in Excel. These commands will help you calculate and analyze numerical data, such as averages and percentages.

  • Screenshot of Excel 2013

    The Data tab makes it easy to sort and filter information in your workbook, which can be especially helpful if your project contains a large amount of data.

  • Screenshot of Excel 2013

    You can use the Review tab to access Excel's powerful editing features, including comments and track changes. These features make it easy to share and collaborate on workbooks.

  • Screenshot of Excel 2013

    The View tab allows you to switch between different views for your workbook and freeze panes for easy viewing. These commands will also be helpful when preparing to print a workbook.

  • Screenshot of Excel 2013

    Contextual tabs will appear on the Ribbon when working with certain items, like tables and pictures. These tabs contain special command groups that can help you format these items as needed.

Certain programs, such as Adobe Acrobat Reader, may install additional tabs to the Ribbon. These tabs are called add-ins.

To minimize and maximize the Ribbon:

The Ribbon is designed to respond to your current task, but you can choose to minimize it if you find that it takes up too much screen space.

  1. Click the Ribbon Display Options arrow in the upper-right corner of the Ribbon.


    Screenshot of Excel 2013
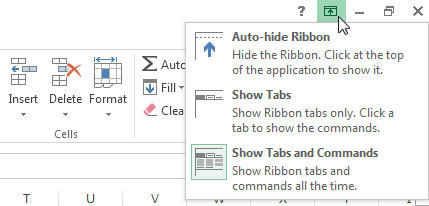
Ribbon Display options
  2. Select the desired minimizing option from the drop-down menu:


    • Auto-hide Ribbon: Auto-hide displays your workbook in full-screen mode and completely hides the Ribbon. To show the Ribbon, click the Expand Ribbon command at the top of screen.


      Screenshot of Excel 2013
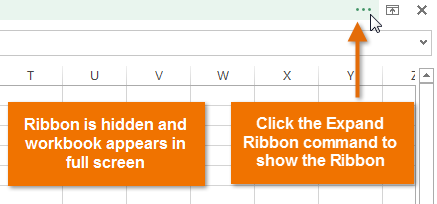
Auto-hiding the Ribbon
    • Show Tabs: This option hides all command groups when they're not in use, but tabs will remain visible. To show the Ribbon, simply click a tab.


      Screenshot of excel2013
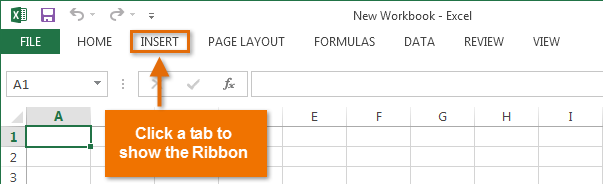
Showing only Ribbon tabs
    • Show Tabs and Commands: This option maximizes the Ribbon. All of the tabs and commands will be visible. This option is selected by default when you open Excel for the first time.

To learn how to add custom tabs and commands to the Ribbon, review our Extra on Customizing the Ribbon.

To learn how to use the Ribbon with touch-screen devices, review our Extra on Enabling Touch Mode.

The Quick Access toolbar

Located just above the Ribbon, the Quick Access toolbar lets you access common commands no matter which tab is selected. By default, it includes the Save, Undo, and Repeat commands. You can add other commands depending on your preference.

To add commands to the Quick Access toolbar:

  1. Click the drop-down arrow to the right of the Quick Access toolbar.
  2. Select the command you want to add from the drop-down menu. To choose from more commands, select More Commands.
    Screenshot of Excel 2013
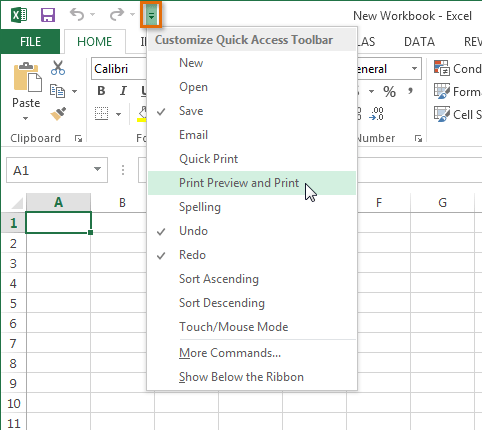
Adding a command to the Quick Access toolbar
  3. The command will be added to the Quick Access toolbar.


    Screenshot of Excel 2013The added command

Backstage view

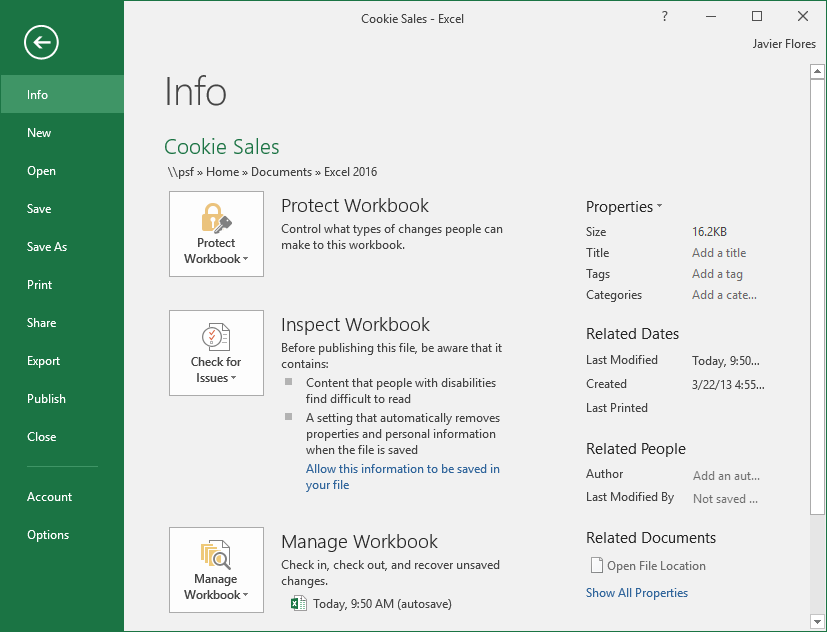
Backstage view gives you various options for saving, opening a file, printing, and sharing your workbooks.

To access Backstage view:

  1. Click the File tab on the Ribbon. Backstage view will appear.
    Excel
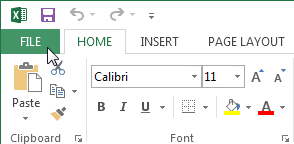
Clicking the File tab

Click the buttons in the interactive below to learn more about using Backstage view.

edit hotspotsThe Backstage view.

Worksheet views

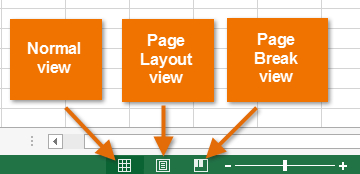
Excel 2013 has a variety of viewing options that change how your workbook is displayed. You can choose to view any workbook in Normal view, Page Layout view, or Page Break view. These views can be useful for various tasks, especially if you're planning to print the spreadsheet.

  • To change worksheet views, locate and select the desired worksheet view command in the bottom-right corner of the Excel window.
Screenshot of Excel 2013Worksheet view options

Click the arrows in the slideshow below to review the different worksheet view options.

View the slides below to review the different worksheet view options.

  • Screenshot of Excel 2013

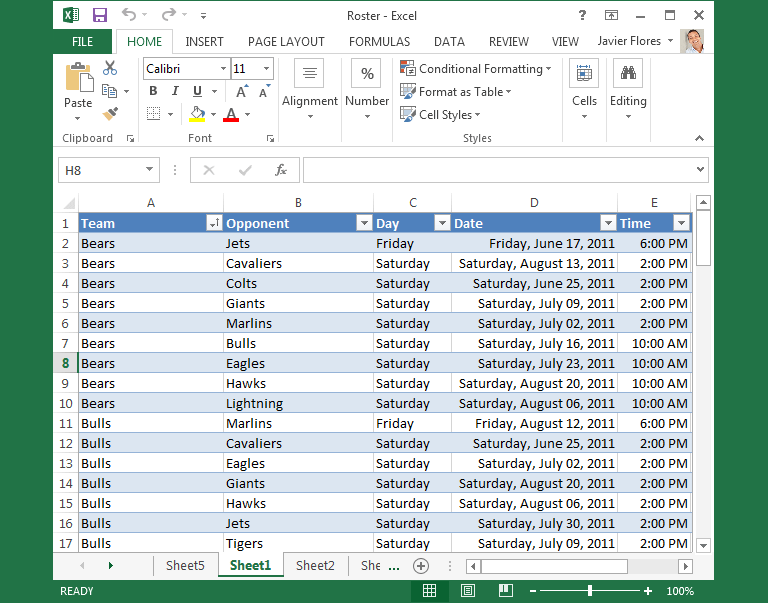
    Normal view: This is the default view for all worksheets in Excel.

  • Screenshot of Excel 2013

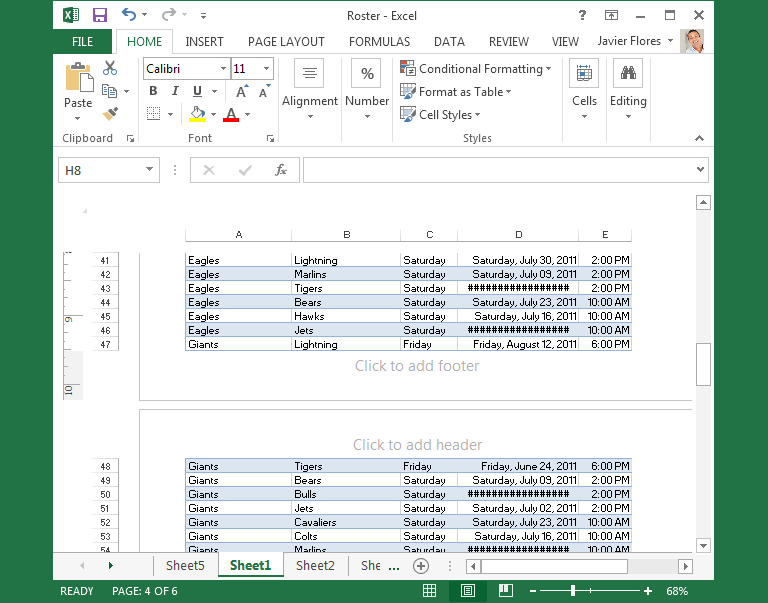
    Page Layout view: This view can help you visualize how your worksheet will appear when printed. You can also add headers and footers from this view.

  • Screenshot of Excel 2013

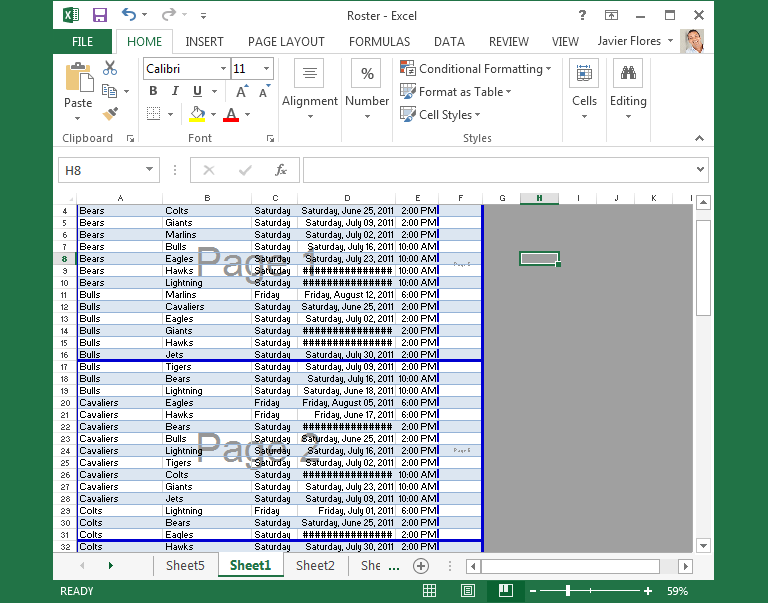
    Page Break view: This view makes it easy to change the location of page breaks in your workbook, which is especially helpful when printing a lot of data from Excel.

Challenge!

  1. Open Excel 2013.
  2. Click through all of the tabs, and review the commands on the Ribbon.
  3. Try minimizing and maximizing the Ribbon.
  4. Add a command to the Quick Access toolbar.
  5. Navigate to Backstage view, and open your Account settings.
  6. Try switching worksheet views.
  7. Close Excel (you do not have to save the workbook).

/en/excel2013/creating-and-opening-workbooks/content/

Quick Access Toolbar

The Quick Access Toolbar lets you access common commands no matter which tab is selected. You can customize the commands depending on your preference.

Screenshot of Excel 2013

Return to Excel

You can use the arrow to close Backstage view and return to Excel.

Screenshot of Excel 2013

The Ribbon

The Ribbon contains all of the commands you will need to perform common tasks in Excel. It has multiple tabs, each with several groups of commands.

Screenshot of Excel 2013

Microsoft Account

From here, you can access your Microsoft account information, view your profile, and switch accounts.

Screenshot of Excel 2013

Info

The Info pane will appear whenever you access Backstage view. It contains information about the current workbook.

Screenshot of Excel 2013

New

From here, you can create a new blank workbook or choose from a large selection of templates.

Screenshot of Excel 2013

Open

From here, you can open recent workbooks, as well as workbooks saved to your OneDrive or on your computer.

Screenshot of Excel 2013

Name Box

The Name box displays the location, or name, of a selected cell.

Screenshot of Excel 2013

Formula Bar

In the formula bar, you can enter or edit data, a formula, or a function that will appear in a specific cell.

Screenshot of Excel 2013

Column

A column is a group of cells that runs from the top of the page to the bottom. In Excel, columns are identified by letters.

Screenshot of Excel 2013

Save and Save As

Use Save and Save As to save your workbook to your computer or to your OneDrive.

Screenshot of Excel 2013

Cell

Each rectangle in a workbook is called a cell. A cell is the intersection of a row and a column. Simply click to select a cell.

Screenshot of Excel 2013

Print

From the Print pane, you can change the print settings and print your workbook. You can also see a preview of your workbook.

Screenshot of Excel 2013

Share

From here, you can invite people to view and collaborate on your workbook. You can also share your workbook by emailing it as an attachment.

Screenshot of Excel 2013

Export

You can choose to export your workbook in another format, such as PDF/XPS or Excel 1997-2003.

Screenshot of Excel 2013

Row

A row is a group of cells that runs from the left of the page to the right. In Excel, rows are identified by numbers.

Screenshot of Excel 2013

Close

Click here to close the current workbook.

Screenshot of Excel 2013

Account

From the Account pane, you can access your Microsoft account information, modify your theme and background, and sign out of your account.

Screenshot of Excel 2013

Options

Here, you can change various Excel options, settings, and language preferences.

Screenshot of Excel 2013

Worksheets

Excel files are called workbooks. Each workbook holds one or more worksheets. Click the tabs to switch between them, or right-click for more options.

Screenshot of Excel 2013

Vertical and Horizontal Scroll Bars

The scroll bars allow you to scroll up and down or side to side. To do this, click and drag the vertical or horizontal scroll bar.

Screenshot of Excel 2013

Worksheet View Options

There are three ways to view a worksheet. Simply click a command to select the desired view.

Screenshot of Excel 2013

Zoom Control

Click and drag the slider to use the zoom control. The number to the right of the slider reflects the zoom percentage.

Screenshot of Excel 2013
chatsimple