Word 2000 -
Print Preview and Print

Word 2000
Print Preview and Print


/en/word2000/save-and-save-as/content/
Print Preview allows you to see how your file looks before you print, preventing a waste of paper and ink.
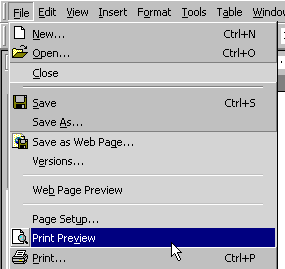
![]() Choose File
Choose File![]() Print Preview from the menu bar.
Print Preview from the menu bar.

![]() Click the Print Preview button
Click the Print Preview button ![]() on the Standard toolbar.
on the Standard toolbar.
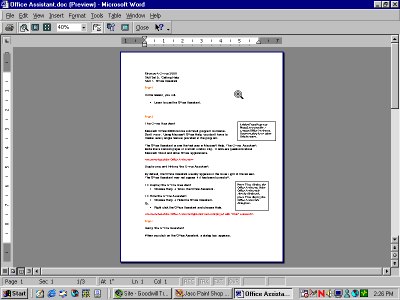
Once you have accessed Print Preview, your document will now be in Print Preview mode. It will look something like this:

Print Preview mode displays how your file is formatted. If you want to take a closer look, use the zoom feature. The zoom feature zooms in closer, giving you a better view of your file.
Let's zoom in and take a look at the Print Preview toolbar:

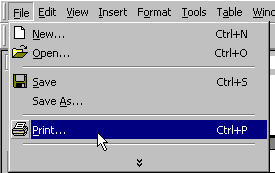
![]() Choose File
Choose File![]() Print from the menu bar (Ctrl+P).
Print from the menu bar (Ctrl+P).
![]() The print dialog box will appear.
The print dialog box will appear.

![]() Click the Print button
Click the Print button ![]() on the Standard toolbar.
on the Standard toolbar.
![]() The file automatically prints. The print dialog box will not appear.
The file automatically prints. The print dialog box will not appear.
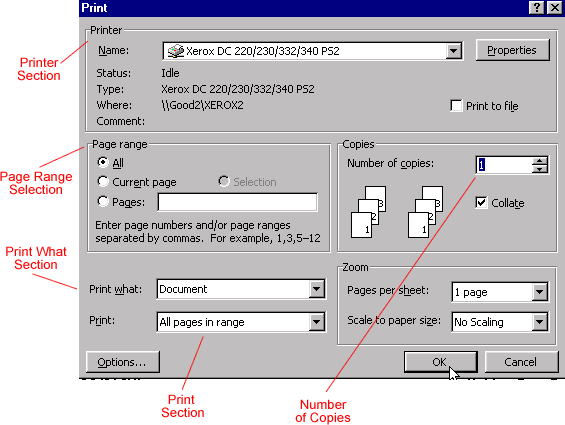
Here's what the Print dialog box looks like in Word 2000:

In the Name: drop-down box, the name(s) of your printer display(s). When working in an office environment, it is possible that your computer is part of a network that accesses several printers. Make sure you direct your print job to the correct printer.
The default setting is all. If you want to print only the current page, select the current page radio button. If you want to print only part of a document but it is more than one page, select the Pages radio button and enter the page numbers you want to print.
In this section, there is a Number of copies: box. The default setting is 1 copy. Manually enter the number you want to print by highlighting the number. Enter the number of copies you want to print. You can use the up or down arrows to indicate the desired number of copies.
Collate is the default setting. Collate means to put pages in the proper order. If you want to turn off the collating feature, deselect the radio button. This means if you print more than one copy of a document, all of the first pages will print together, all of the second pages will print together, and so on.
You want to print a document. Leave this at the default setting.
The default setting is all pages in range. However, in the drop-down box, select even pages or odd pages if you want, or select a range of pages.
/en/word2000/align-buttons/content/