Lesson 11: Managing User Accounts
/en/windowsxp/searching-for-files-and-folders/content/
Introduction
By the end of this lesson, you should be able to:
- Understand the nature of user accounts
- Create a new account
- Change an account
- Change the way users log on and off
Understanding user accounts
A user is someone who uses a computer. A user account defines what a user can do using Windows XP. In Windows XP, there are three types of user accounts.
- Administrator account. The administrator can do everything with the computer and can go anywhere he or she desires—essentially giving that person control over the entire computer, including other accounts. The administrator account can never be disabled or deleted.
- Standard account. Users with standard accounts can install programs and hardware, change pictures and related personal data, and create, change, or remove passwords.
- Guest account. A guest account doesn't require a password, can't add or remove programs from the computer, and is disabled by default. This account type is ideal for kids and students.
Managing user accounts
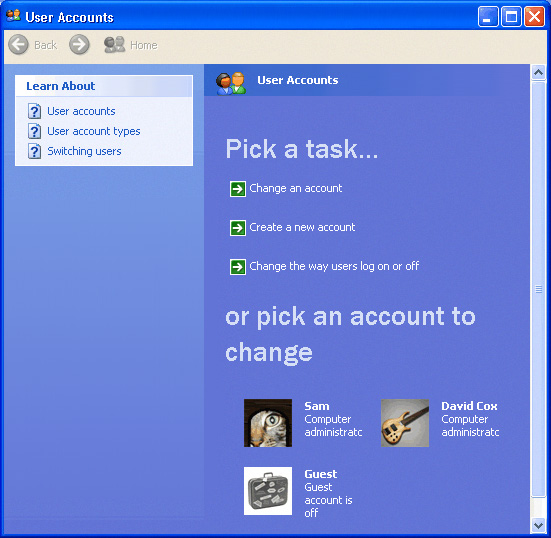
To easily manage user accounts, click the User Accounts icon in the Control Panel.
The User Accounts window presents you with an easy-to-use interface.
Creating a new account
You can create new user accounts as needed, giving others access to your computer (without sharing your password).
To create a new account:
- Click Create a New Account in the User Accounts window.
- A User Accounts window appears. Enter the name of the new account, then click Next.
- The next window asks you to pick an account type. Choose Computer Administrator or Limited by clicking the appropriate radio button.
- If you're not sure, click each one and read the list of actions that can be performed by the account type.
- When finished, click the Create Account button.
- The new account now appears in the User Account window.
Changing an account
Any account can be easily edited or changed from the User Accounts window.
To change an existing user account:
- Click Change an Account in the User Accounts window.
- A window appears asking you which account you want to change.
- The next window (figure below) allows you to change the name on the account, the picture, and the account type; create a password; and delete the account. Make necessary changes.
- Use the Back button to return to the original list to make any additional changes.
Passwords provide security and prevent unauthorized users from logging in by using someone else's user account. For more information on passwords, see our Password Tips lesson.
Changing user log on and log off procedures
You can also select the way users log on and log off.
To change log on and log off options:
- Click Change the way users log on and off in the User Accounts window.
- You'll see two check boxes that allow you to enable the Welcome screen and Fast User Switching. Fast User Switching allows you to switch to another user account without closing any programs.
Challenge!
- Open the Control Panel.
- Click the User Accounts link.
- Change the picture associated with your user account.
- Familiarize yourself with the concepts explained in this lesson.
/en/windowsxp/taking-advantage-of-accessibility-options/content/