There are many things to keep in mind when giving a presentation. How long will your presentation last? What will you say? If you're not in the same location as your audience, how will they view it? Fortunately, PowerPoint 2010 offers several tools to help you ensure your presentation goes smoothly.
In this lesson, you will learn how to rehearse and record slide shows in advance. You will also learn about alternative presentation options, such as creating a video of your presentation and broadcasting your presentation to remote audiences. Finally, you will learn how to create handouts of your presentation and customize it with hidden or rearranged slides.
Rehearse and record slide shows
It's good practice to rehearse your presentation before you present your slide show to an audience. You can use PowerPoint's Rehearse Timings feature to advance slides while you practice presenting. If you are unable to present your slide show, PowerPoint's Record Slide Show feature allows you to record narration.
Optional: You can download this example for extra practice.
Rehearsing slide show timings
Rehearsing timings can be useful if you want to set up a presentation to play at a certain speed without having to click through the slides to present it. Think of it as a tool to help you practice presenting your slide show. Using this feature, you can save timings for each slide and animation. PowerPoint will then play back the presentation with the same timings when you present it.
To rehearse timings:
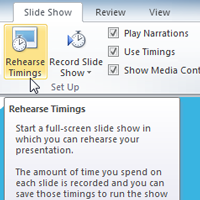
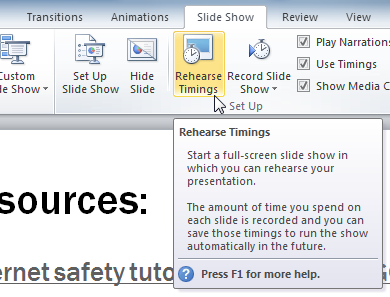
Select the Slide Show tab, and locate the Set Up group.
Click the Rehearse Timings command. You will be taken to a full-screen view of your presentation.
The Rehearse Timings command
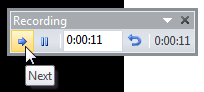
Practice presenting your slide show. When you're ready to move to the next slide, click the Next button on the Recording toolbar in the top-left corner. If you prefer, you can also use the right arrow key.
Navigating to the next slide using the Recording toolbar
When you've reached the end of the show, press the Esc key to end your slide show. A dialog box will appear with the total time of your presentation.
Verifying the new slide timings
If you are satisfied with your timings, click Yes.
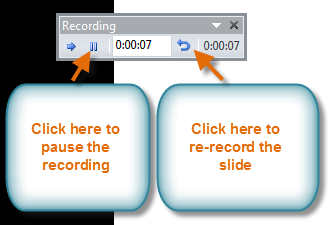
If you need more than one try to get the timings just right, the Recording toolbar has options to let you take a break or start over on a slide. To pause the timer, click the pause button on the toolbar. No actions taken while the timer is paused will be included in the timings. To re-record the timings on the current slide, click the repeat button.
The Recording toolbar
Recording your slide show
The Record Slide Show feature is similar to the Rehearse Timings feature, but it's more comprehensive. If you have a microphone for your computer, you can even record voiceovernarration for the entire presentation. This is useful if you plan on using your slide show for a self-running presentation or a video. Your mouse won't show up on screen in recorded slide shows, so if you want to point out details on screen, you can use PowerPoint's laser pointer option.
To record a slide show:
Click the Slide Show tab, and locate the Set Up group.
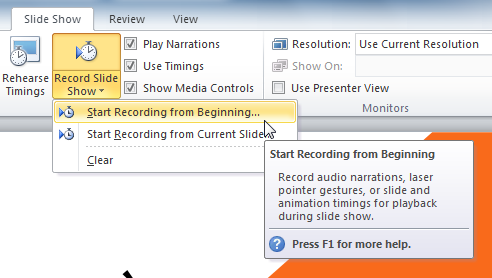
Click the Record Slide Show drop-down arrow.
The Record Slide Show command
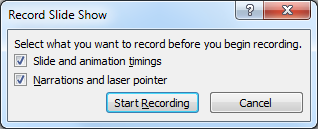
Select either Start Recording from Beginning or Start Recording from Current Slide. The Record Slide Show dialog box will appear.
Select the desired options. Remember, you can only record narration if you have a microphone attached to your computer.
The Record Slide Show dialog box
Click Start Recording. Your presentation will open up to a full-screen view.
Perform your slide show. Make sure to speak clearly into the microphone if you are recording narration. When you are ready to move to the next slide, click the Next button on the Recording toolbar in the top-left corner, or use the right arrow key.
Navigating to the next slide using the Recording toolbar
When you reach the end of the show, press the Esc key to exit.
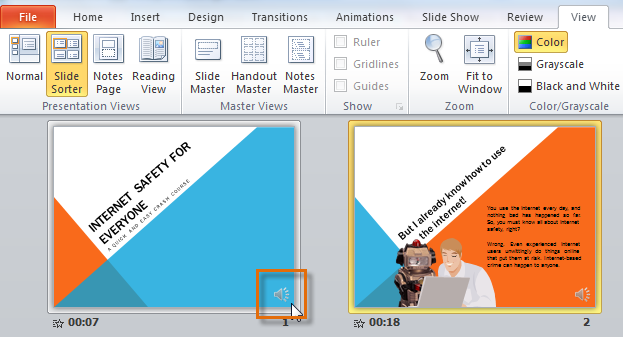
Your slide show timings and narration are now included in your presentation. The slides with narration will be marked with a speaker icon in the bottom-right corner.
Slides with narration
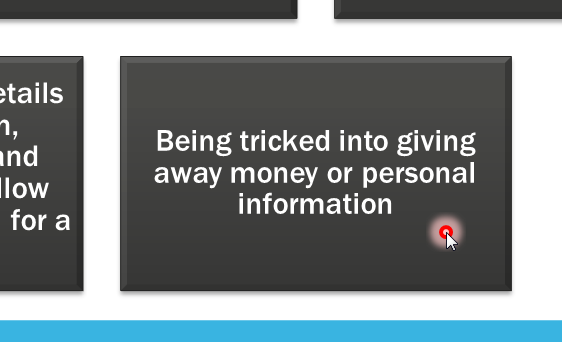
To point out details during your recording, press and hold the Ctrl key on your keyboard. Your cursor will show up as a laser pointer. Move your mouse to indicate the desired details. Release the Ctrl key when you are finished pointing out things on screen.
Using the laser pointer
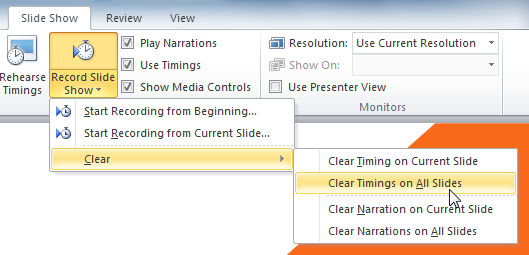
To remove narration or timings from a recorded slide show:
Click the Slide Show tab, and locate the Set Up group.
Click the Record Slide Show drop-down arrow.
Hover your mouse over Clear.
Clearing timing on all slides
Select the desired option.
Sharing presentation options
PowerPoint 2010 offers several options to enhance or even totally change the way you deliver presentations. Instead of presenting your slide show normally, you can choose to present it as a video or broadcast it live online so others can view it remotely. No matter how you choose to give your presentation, you can enhance it by customizing your slide show to remove or reorder slides and printing handouts to help your audience take notes. All of these options can help you give a polished and professional presentation.
Presenting your slide show as a video
The Create a Video feature allows you to save your presentation as a video. This can be useful because it lets viewers watch the presentation whenever they want. To make sure your viewers have enough time to view each slide, you might want to rehearse the timings or record your slide show before using this feature.
To create a video:
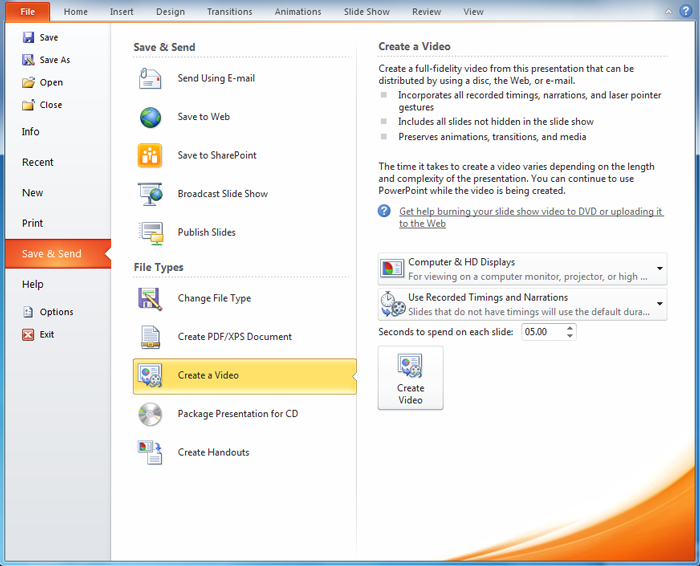
Click the File tab. This takes you to Backstage view.
Select Save and Send.
Select Create a Video under File Types. The Create a Video menu will appear on the right.
Creating a video in the Save and Send tab
Click the drop-down arrow next to Computer and HD Displays to select the size and quality of your video.
Selecting video size and quality
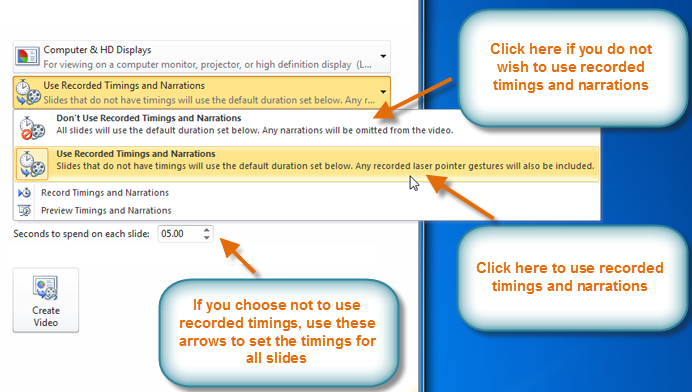
Select the drop-down arrow next to Recorded Timings and Narrations.
Choose Don't Use Recorded Timings and Narrations if you don't have or don't want to use recorded timings. You can adjust the default Seconds to spend on each slide: in the box below the drop-down menu.
Choose Use Recorded Timings and Narrations if you have already recorded timings and narrations and want to use them in your video.
Selecting recorded timings and narration
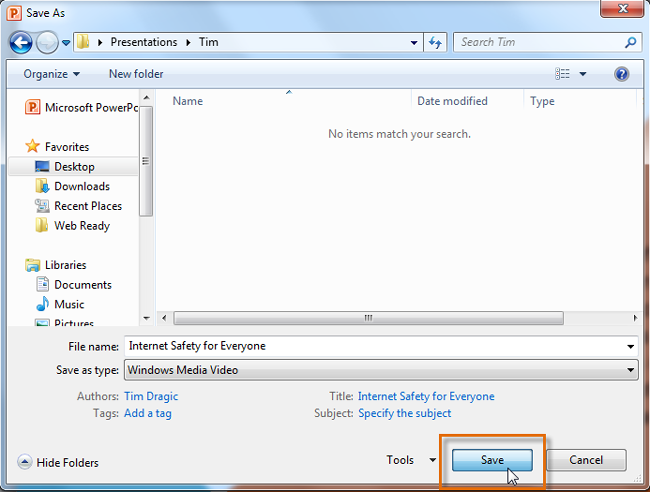
Click the Create Video command. The Save As dialog box will appear.
Select the location where you want to save the presentation, then enter a name for the presentation.
Saving the video
Click Save. A status bar will appear in the bottom-right corner of the PowerPoint window as PowerPoint creates your video. When the bar is completely green, your video is ready to view, send, or upload.
The status bar marking the time until the video is complete
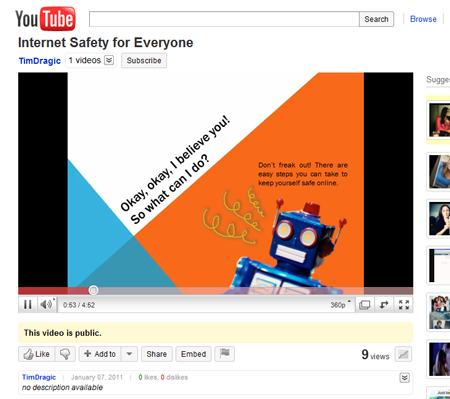
In addition to emailing your video, you can upload your video to free video sharing sites like YouTube.com. YouTube offers guides to creating an account and uploading videos. Once your video is uploaded, you can give the link to anyone you want to see it.
The finished video uploaded to YouTube
Broadcasting your slide show to remote audiences
Broadcasting a presentation remotely is surprisingly easy. All you and your viewers need is an Internet connection—they don't even need PowerPoint. Once your viewers are connected, you can start the presentation as you normally would.
Please note that you cannot edit your presentation or mark it with a highlighter or pen while you are broadcasting a slide show. You also cannot use PowerPoint to speak to your audience. Plan to communicate with your viewers through teleconferencing, or pre-record your narration.
To broadcast a slide show:
Select the Slide Show tab, and locate the Start Slide Show group.
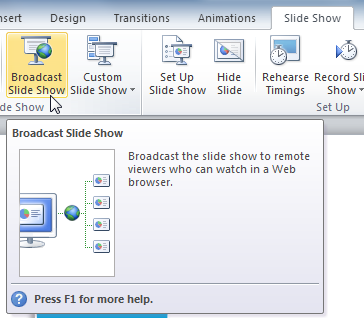
Click the Broadcast Slide Show command. The Broadcast Slide Show dialog box will open.
The Broadcast Slide Show command
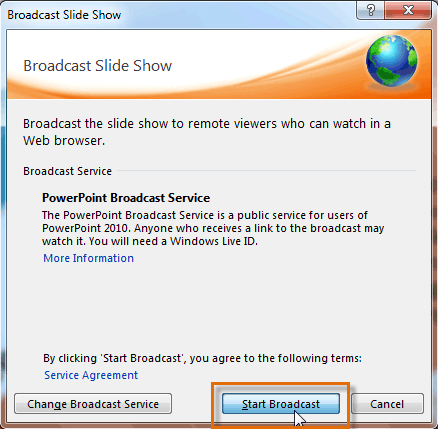
Click Start Broadcast. A status bar will appear as PowerPoint prepares your broadcast.
The Broadcast Slide Show dialog box
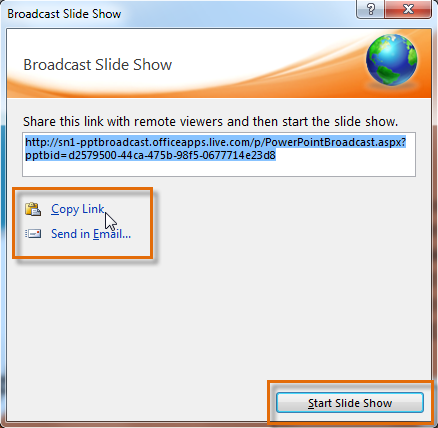
A link will appear. Select the link, and click Copy Link to make a copy of the link or Send in Email to send an email with the link to your viewers.
Copying the link for the broadcast
Click Start Slide Show.
Present your slide show.
When you are finished, click End Broadcast in the yellow bar at the top of the screen.
Ending the broadcast
Customizing your slide show
Sometimes you might want to hide a slide while still keeping it in your presentation. For instance, if you are presenting a slide show to more than one group of people, hiding or even rearranging certain slides can help you tailor your slide show to each group you present it to. You could also choose to create a shortened version of your slide show to present when you're short on time. The Custom Slide Show feature allows you to create and name different versions of your slide show with hidden or rearranged slides.
To create a custom show:
Select the Slide Show tab, and locate the Start Slide Show group.
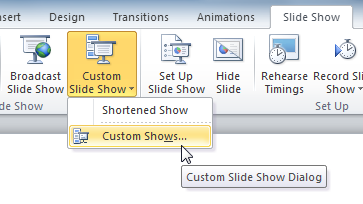
Click the Custom Slide Show command.
The Custom Slide Show command
Select Custom Shows... The Custom Shows dialog box will appear.
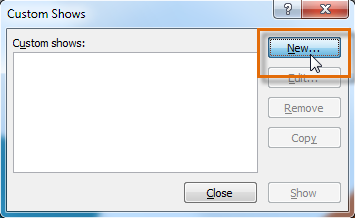
Click New. The Define Custom Show dialog box will appear.
Creating a new custom show
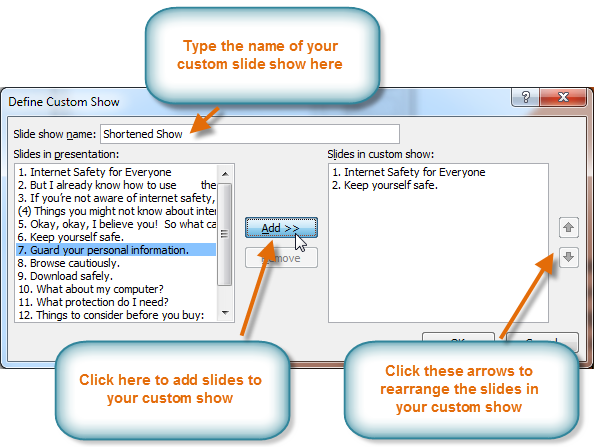
Locate the Slide show name box, and type a name for your custom show.
Select the slides in the Slides in presentation: box that you want to include in your custom show, then click Add>> to add them to the Slides in custom show: box. If necessary, use the up and down arrows to reorder the added slides.
Adding slides to the custom show
Click OK.
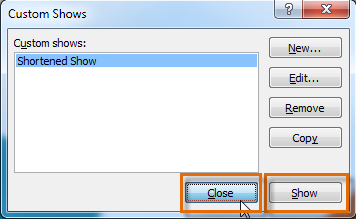
Select Close to exit or Show to view your custom show.
Closing the Custom Show dialog box
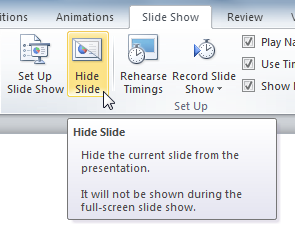
You can also hide slides by selecting the Hide Slide command, which can be found on the Slide Show tab. To unhide a slide, click the Hide Slide command again.
The Hide Slide command
Creating handouts of a presentation
Printing handouts with images of your slides can be helpful to your audience because it gives them a hard copy of the information you're presenting. Plus, they can take notes on the handouts as you present your slide show.
To create handouts of a presentation:
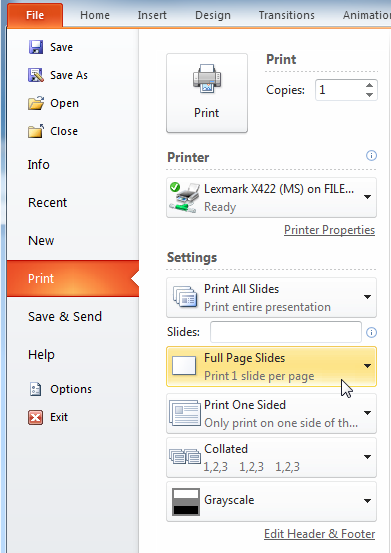
Click the File tab. This takes you to Backstage view.
Click Print.
The Print tab in the Backstage view
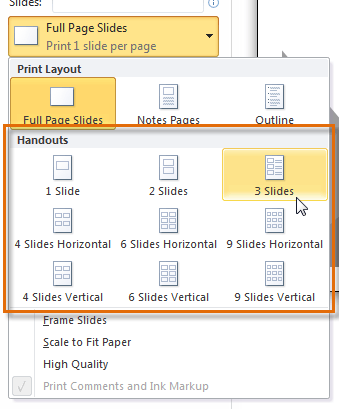
Click the drop-down arrow in the box that says Full Page Slides, and locate the Handouts group.
Select a page layout for your handouts. Up to nine slides can be displayed per page. Note that the 3 slides layout offers lined space for viewers to take notes.
Selecting a handouts layout
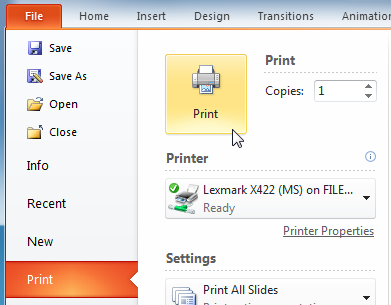
Click the Print command.
Printing the handouts
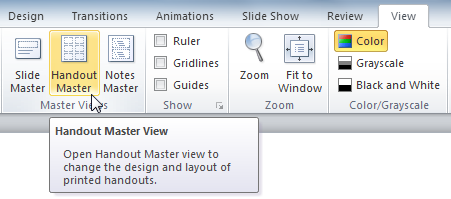
If you want to add a header or footer to your handouts, click the View tab on the Ribbon, then select Handout Master. Then type your header or footer information into the boxes provided. To return to normal view, click Exit Master View.
The Handout Master View command
Challenge!
Open an existing PowerPoint presentation. If you want, you can use this example.
Use the Rehearse Timings feature to record slide and animation timings for the presentation. If you have a microphone attached to your computer, use the Record Slide Show feature.
Create a custom slide show from your presentation.