OS X Mountain Lion -
Camera and Photos

OS X Mountain Lion
Camera and Photos


/en/macosxmountainlion/everyday-tasks/content/
If you have an iPad, iPhone, or iPod Touch, you probably know how much fun it can be to take photos and videos on your mobile device. Did you know you can access your photos and videos on your Mac as well? To get started, you should make sure you're familiar with the apps below.
There are many benefits to using these apps if you have more than one Apple device. They're designed specifically so you can access your photos and videos anywhere (on your iPad, iPhone, iPod Touch, or Mac), no matter where the photo or video is saved.
We'll be using the iPad for most of the demonstrations in this lesson, but if you have another device, don't worry. The corresponding apps for the iPhone, iPod Touch, and Mac are fairly similar. The important thing is that you get to know some of the basic tools and features and come away with a solid understanding of what each app can do. Then you can explore the apps some more on your own.
The Camera app is your resource for taking photos with your mobile device, as well as HD videos that have high-quality picture and sound. It's designed to work closely with the Photos app, which lets you view, organize, and edit the media you've captured.
If you have one of the newer models, you can even take advantage of your device's front and back camera to photograph what's in front of you or take a self portrait instead. The interface is similar across devices, so you should be able to learn your way around the app fairly quickly.
Click the arrows to view Camera on each device.
Camera is not available for the Mac. However, you can still take photos with your computer (front-facing only) using an app called Photo Booth. We'll take a closer look at Photo Booth on the last page of this lesson.

Your device's camera is more of a utility than an app, so syncing doesn't really apply here. You can sync your photos and videos, however, using a feature called iCloud Photo Sharing. We'll take a closer look at this option when we discuss the Photos app on page 4.
As you already know, the Camera app is different on each device—but there are many similarities when it comes to basic tools and features. Use the interactive below to learn how to perform several common tasks in the iPhone version.

Use the slider to switch between photo and video.
Tap here to switch between the front-facing camera and the back-facing camera.
To take a photo, tap the camera button.
Alternatively, you can use the volume buttons on the side of your device. Some people find it easier to hold the camera steady this way.
Tap to view the most recent photo you've taken. Here, you can quickly share, delete, or even edit the photo (with options like crop, remove red-eye, and more).

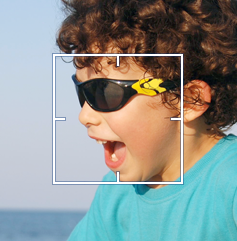
The app is designed to detect and focus on faces automatically.
If you want to change the focus to something else, tap the area you want to focus on. A small square will flash on the screen, and the camera will adjust.
Use Options to turn on a grid, or enable HDR photos.
On newer versions of the iPhone and iPod Touch, you can even take a panorama. Just tap the button, and move your camera across the scene (for example, a landscape or a street scene).
Tap Auto to turn the automatic flash on or off.

Once you know your way around the app, consider these tips for getting the most out of Camera.
On the iPhone and iPod Touch, you can access Camera even more quickly using the icon on your lock screen. Just drag the icon up, and the app will open instantly—there's no need to unlock your device first.
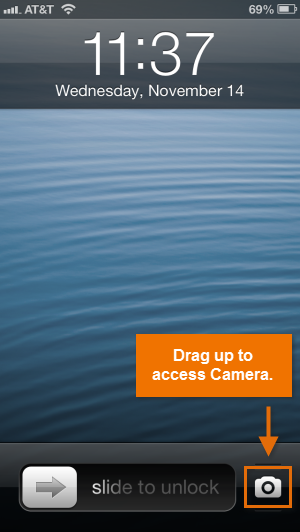 Quick access to Camera
To zoom in or out in the Camera app, use the pinch gesture. This option is great for taking close-up photos when you can't get close enough to your subject (like in a crowd, at a public event, or when photographing wildlife).
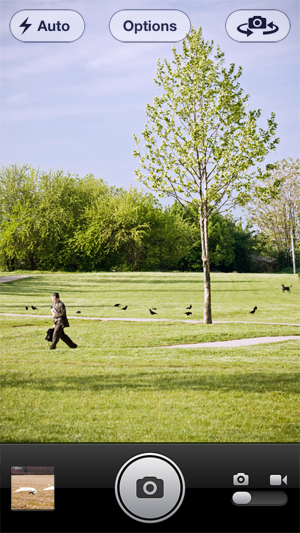 Zoomed out
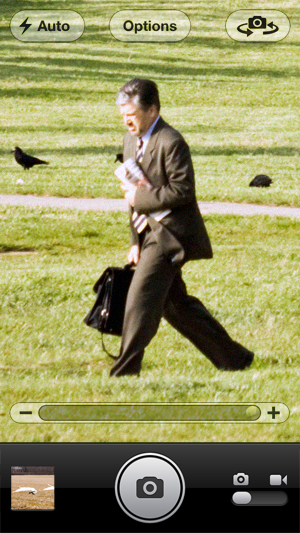 Zoomed in
You may want to use this feature sparingly if image quality is important to you. Because Apple devices don't have an actual zoom lens, the picture will start to appear grainy the more you zoom in.
To take a screenshot on an Apple mobile device, all you have to do is press the Home button and the Sleep/Wake button at the same time. This will take a photo of what's on your screen—just like all the images you've seen throughout this tutorial.
What happens when you take a photo or video on your device? It goes straight to the Photos app. Photos is where you'll be able to view and manage of all your media—including miscellaneous photos and videos you've saved to your device (from an email, text message, or anywhere on the Web).
You can use Photos to create slideshows, organize your photos and videos into albums, and share media in a variety of ways. You can even sync the app across devices using a feature called iCloud Photo Sharing so you can access your photos anytime. Check out Apple's overview of iCloud Photo Sharing to learn more about how it works.
Click the arrows to view Photos on each device.
Photos is not available for the Mac. However, you can still manage your photos and access iCloud Photo Sharing using an app called iPhoto. We'll take a closer look at iPhoto on the last page of this lesson.

Use iCloud to sync your photos via iCloud Photo Sharing. To find out if you already have it enabled, visit your device's iCloud settings. Remember, you have to configure each device separately.
As you already know, the Photos app is different on each device—but there are many similarities when it comes to basic tools and features. Use the interactive below to learn how to perform several common tasks in the iPad version.

To view a photo, just tap the one you want. The photo will open in full-screen mode, where you can share, edit, or delete it.
To navigate to another photo in full-screen mode, swipe left or right, or use the navigation bar at the bottom.
Visit Albums to organize your photos into groups. This is a great way to manage your photos and videos if you have lots of media saved to your device.
To create a new album, tap the + button in the upper left corner.
Tap Photo Stream to access all your photos and videos across devices, including your iPad, iPhone, iPod Touch, and Mac—even your Windows PC.
Photo Stream will sync your photos automatically anytime you're connected to Wi-Fi. You just have to make sure you have the feature enabled in iCloud—then you can access your photos anytime.
Under Places, you can view your photos by location. Just tap a pin on the map, and a thumbnail of the photo will appear.
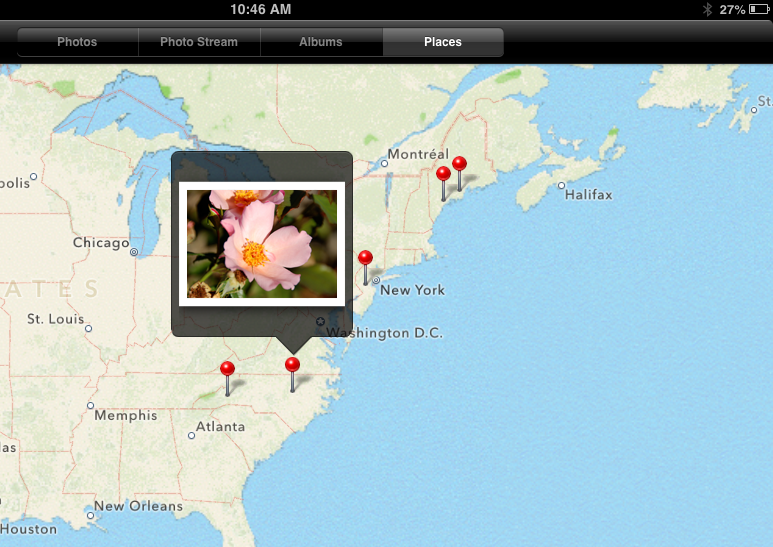
Use this option to start a slideshow of your photos. You can even choose what type of transition to use between slides, and whether or not to play music in the background.
Tap Edit to quickly manage your photos and videos. Here, you can share or delete multiple files by selecting more than one at a time. Alternatively, you can add the selected files to an album.

Photos (also known as your Camera Roll) is where the app stores all the photos and videos you've taken with your device.

Once you know your way around the app, consider these tips for getting the most out of Photos.
Sharing photos and videos from the Photos app is easy. All you have to do is tap the Share button  anytime you see it (like when you're viewing an image in full-screen mode). From there, you'll be able to share the photo on Twitter or Facebook or send it in a text. You can even assign the image to a contact or make it your device's wallpaper.
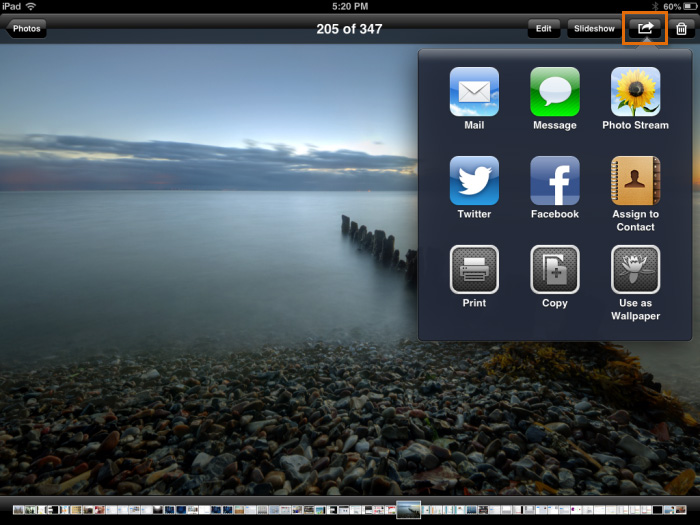 Sharing a photo
The Photos app also lets you edit your photos with simple options like rotate, enhance, remove red-eye, and crop. This is a great resource for correcting minor problems with your photos without having to switch to an advanced image editor.
To access editing options, tap Edit while viewing a photo in full-screen mode.
Your options will appear at the bottom of the screen. Remember to tap Save when you're done.
 Editing a photo
You can use Photo Booth to take fun snapshots of you and your friends. Just like the Camera app, it uses your device's built-in camera to capture photos. The difference is that it comes with a range of special effects for you to choose from. For example, you can apply a stretch, X-ray, or thermal camera effect. You can also use the app to take regular portraits without applying any effects.
 The Photo Booth App
Photo Booth is available for the iPad and Mac only.
iPhoto is the Mac equivalent of the Photos app. Not only can it be used to manage the photos on your computer, but it also gives you access to iCloud Photo Sharing, where you can view and edit photos you've taken on other devices.
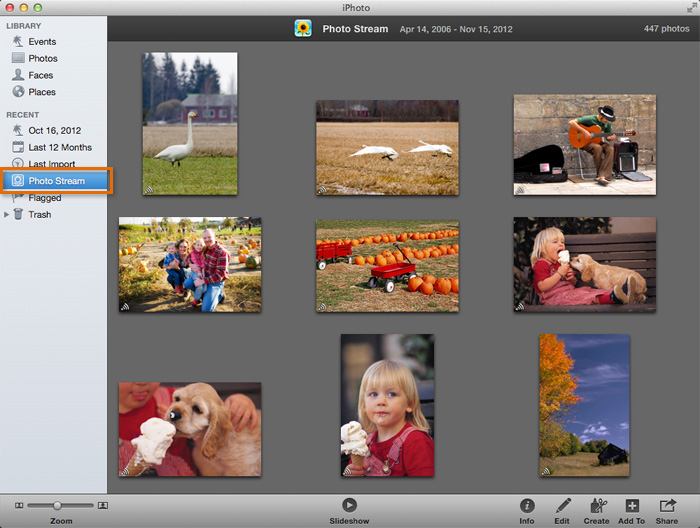 Accessing your Photo Stream
iPhoto also comes with several other features Photos doesn't have, including Facebook integration and advanced editing. You can even use the app to create cards, books, and other printed materials from your photos. Just pick a template, and iPhoto will walk you through the process. When you're done, you can order the final product from its printing press.
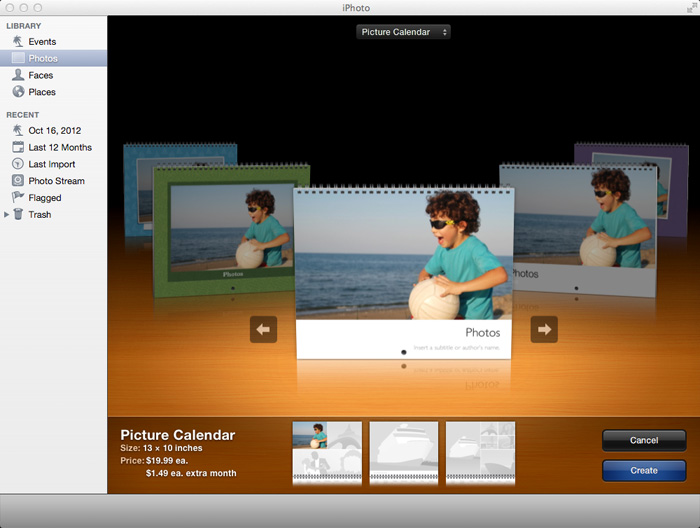 Creating a calendar in iPhoto
iPhoto comes built into the Mac. A mobile version can be purchased for the iPad, iPhone, and iPod Touch.
Other mobile apps from third-party developers (apps that are supported by Apple but not developed by Apple) can be downloaded in the App Store. There, you'll find a variety of tools that can help you take, edit, and share photos. These include:
Remember, the App Store is filled with thousands of choices. If you have something particular in mind (maybe an app for your favorite service), just search for it. There's a good chance you'll find what you're looking for.
/en/macosxmountainlion/itunes-and-entertainment/content/