Excel 2003 -
Text and Cell Alignments

Excel 2003
Text and Cell Alignments


/en/excel2003/inserting-and-deleting-cells/content/
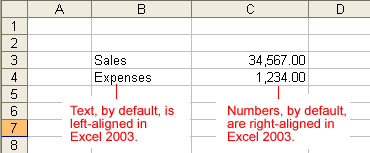
You've probably noticed by now that Excel 2003 left-aligns text (labels) and right-aligns numbers (values). This makes data easier to read.
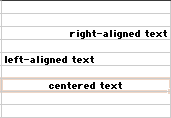
You do not have to leave the defaults. Text and numbers can be defined as left-aligned, right-aligned, or centered in Excel 2003. The picture below shows the difference between these alignment types when applied to labels.
Text and numbers can be aligned using the left-align, center, and right-align buttons of the Formatting toolbar:

We've previously seen how to align text or numbers using the left-align, center, and right-align buttons in the Standard toolbar. You can also define alignment in the Alignment tab of the Format Cells dialog box.

 The Horizontal section features a drop-down menu that contains the same left, center, and right alignment options in the picture above and several more:
"Fills" the cell with the current contents by repeating the contents for the width of the cell.
If the text is larger than the cell width, Justify wraps the text in the cell and adjusts the spacing within each line so all lines are as wide as the cell.
Contents of the cell farthest to the left are centered across the selection of cells. This function is similar to Merge and Center, except the cells are not merged.
 Cells from the menu bar.
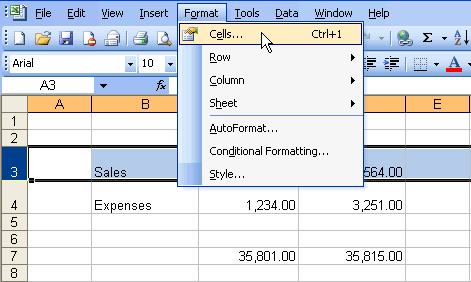
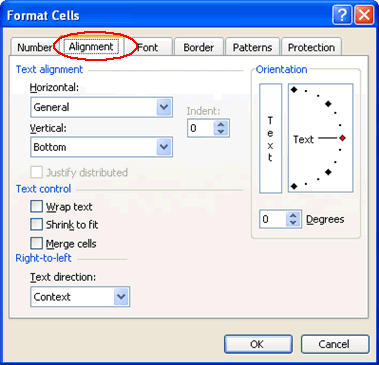
You can also define vertical alignment in a cell, similar to how it is done for horizontal alignment. In vertical alignment, information in a cell can be located at the top of the cell, middle of the cell, or bottom of the cell. The default is bottom.

 Cells from the menu bar.
Text control allows you to control the way Excel 2003 presents information in a cell. There are three types of text control: Wrapped Text, Shrink-to-Fit, and Merge Cells.
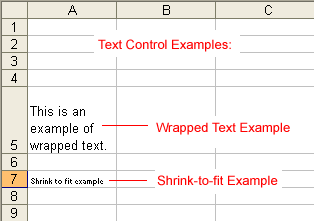
 Wrapped Text wraps the contents of a cell across several lines if it's larger than the column width. It increases the height of the cell as well.
 Shrink-to-Fit shrinks the text so it fits into the cell; the more text in the cell, the smaller it will appear in the cell.
 Merge Cells can also be applied by using the
  Merge and Center button on the Standard toolbar.
 Cells from the menu bar.
The fourth type of cell alignment in the Format Cells dialog box is Text Orientation, which allows text to be oriented 90 degrees in either direction up or down.
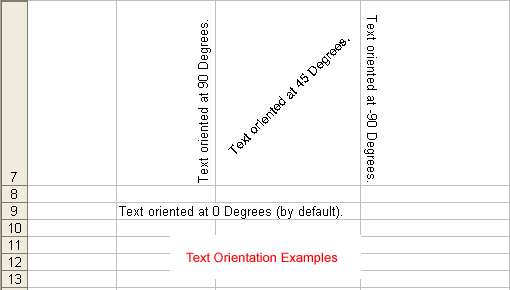
 Cells from the menu bar.
/en/excel2003/formatting-numbers/content/