
Excel 2000 -

Excel 2000
Print

search
menu
/en/excel2000/print-preview/content/
Once you've made the necessary adjustments to your Excel spreadsheet, you're ready to print. Printing in Excel is similar to printing in other Office 2000 applications, so this lesson will review printing basics and emphasize any differences.
OR
![]() Don't print your Excel document without checking spelling first! Excel includes two tools to help correct spelling errors: AutoCorrect and Spelling. For a review of these features, see Word 2000's AutoCorrect and Spelling and Grammar lessons.
Don't print your Excel document without checking spelling first! Excel includes two tools to help correct spelling errors: AutoCorrect and Spelling. For a review of these features, see Word 2000's AutoCorrect and Spelling and Grammar lessons.
Many options are available in the Print dialog box, including:
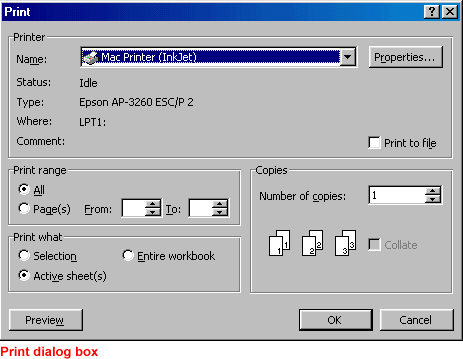
The name of the default printer appears in this box. If you are connected to more than one printer, you can choose the name of the printer to use for this print job. Click the drop-down arrow and make a printer selection.
Use this to view or change the printer's settings.
Using the Print Range option boxes, choose which pages of your document to print.
Click the up or down arrows in the Number of Copies list box to choose the number of copies you want to print.