
Access 2016 -
Designing a Multi-table Query

Access 2016
Designing a Multi-table Query

search
menu
/en/access2016/designing-a-simple-query/content/
In the previous lesson, you learned how to create a simple query with one table. Most queries you design in Access will likely use multiple tables, allowing you to answer more complex questions. In this lesson, you'll learn how to design and create a multi-table query.
Throughout this tutorial, we will be using a sample database. If you would like to follow along, you'll need to download our Access 2016 sample database. You will need to have Access 2016 installed on your computer in order to open the example.
Watch the video below to learn how to create a multi-table query (Part 1).
Watch the video below to learn more about joins and query criteria (Part 2).
Queries can be difficult to understand and build if you don't have a good idea of what you're trying to find and how to find it. A one-table query can be simple enough to make up as you go along, but to build anything more powerful you'll need to plan the query in advance.
When planning a query that uses more than one table, you should go through these four steps:
This process might seem abstract at first, but as we go through the process of planning our own multi-table query you should start to understand how planning your queries can make building them a lot easier.
Let's go through this planning process with a query we'll run on our bakery database. As you read through the planning process step by step, think about how each part of the planning process could apply to other queries you might run.
Our bakery database contains many customers, some of whom have never placed an order but who are in our database because they signed up for our mailing list. Most of them live within the city limits, but others live out of town or even out of state. We want to get our out-of-town customers who've placed orders in the past to come back and give us another try, so we're going to mail them some coupons. We don't actually want our list to include customers who live too far away; sending a coupon to someone who doesn't live in our area probably won't make that person come in. So we just want to find people who don't live in our city but who still live in our area.
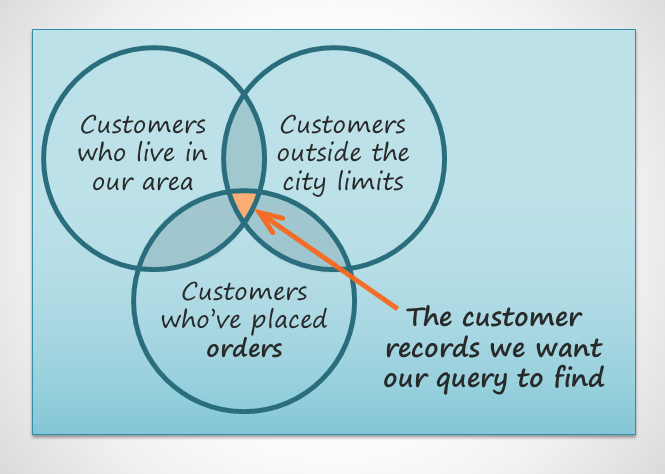
In short, the question we want our query to answer is this: Which customers live in our area, are outside the city limits, and have placed an order at our bakery?
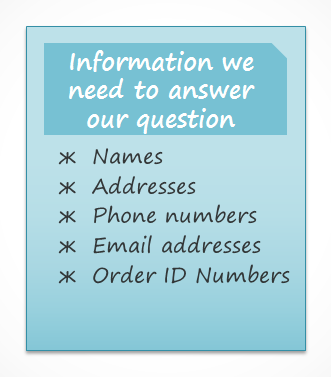
What information might we want to see in a list about these customers? Obviously, we'll need the customers' names and their contact information—their addresses, phone numbers, and email addresses. But how are we going to know if they've placed orders? Each record of an order identifies the customer who placed that order. If we include the order ID numbers, we should be able to narrow our list down to only customers who have previously placed orders.
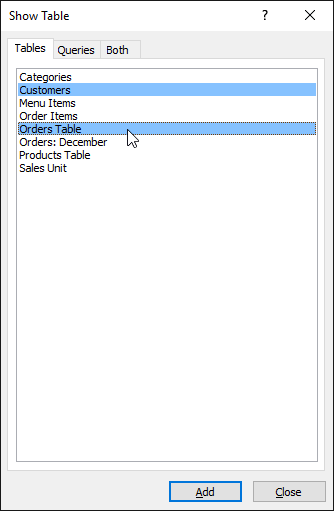
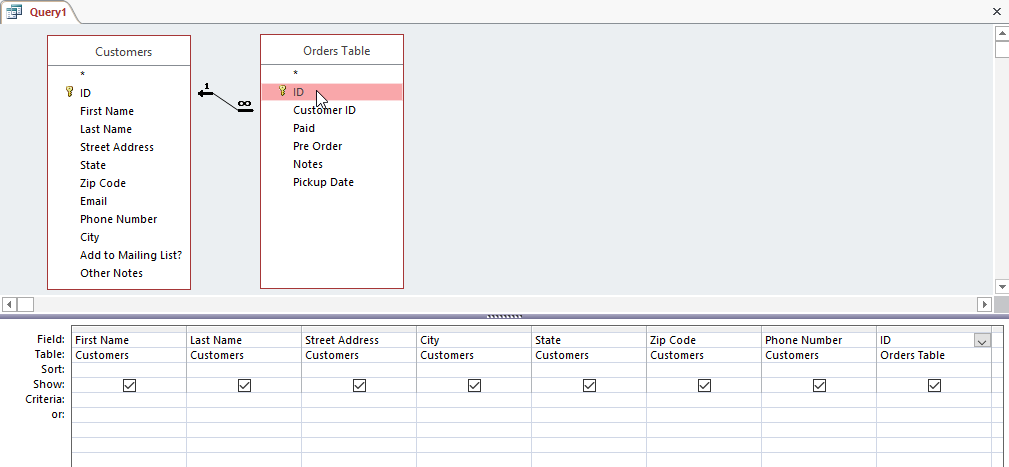
In order to write a query, you need to be familiar with the different tables in your database. From working extensively with our own database, we know that the customer information we need is located in fields in the Customers table. Our Order ID numbers are in a field in the Orders table. We only need to include these two tables to find all of the information we need.

When you set criteria for a field in a query, you are basically applying a filter to it that tells the query to retrieve only information that matches your criteria. Review the list of fields we are including in this query. How and where can we set criteria that will best help us answer our question?
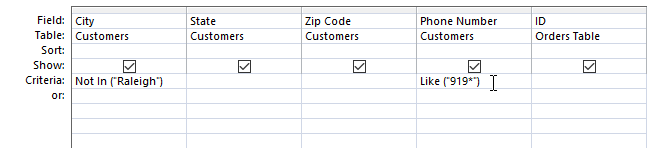
We don't want customers who live in our town, Raleigh, so we want a criteria that will return all records except for those with Raleigh in the city field. We don't want customers who live too far away, either. All of the phone numbers in the area start with the 919 area code, so we'll also include a criteria that will only return records whose entries from the phone number field begin with 919. This should guarantee that we'll only send coupons to customers who live close enough to actually come back and use them.
We won't set a criteria for the order ID field or any other fields because we want to see all of the orders made by people who meet the two criteria we just set.
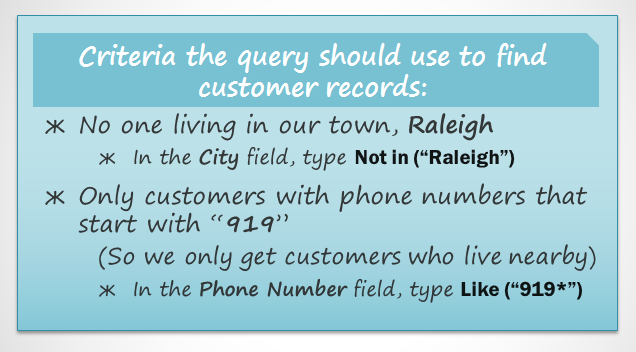
To write queries, you'll need to be able to set criteria in a language that Access understands. As you can see in the image above, our criteria requiring phone numbers to begin with 919 must be typed like this: Like ("919*"). To learn how to write additional criteria, consult our printable Query Criteria Quick Reference Guide, which includes several of the most common criteria used in Access queries.
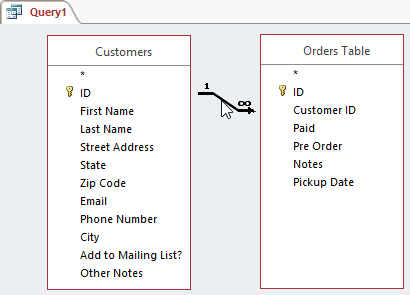
The final thing you need to consider when designing a query is the way you link—or join—the tables you're working with. When you add two tables to an Access query, this is what you'll see in the Object Relationship pane:
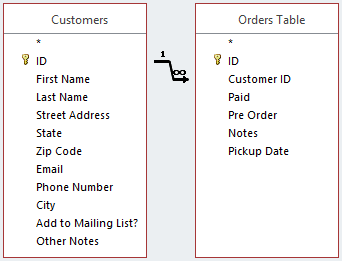
The line connecting the two tables is called the join line. See how the join line is actually an arrow? This is because it indicates the order in which the query looks at data from the two tables. In the image above, the arrow is pointing from left to right, which means the query will look at data in the left table first, then look at only the data in the right table that relates to the records it's already seen in the left table.
Your tables won't always be joined this way. Sometimes Access will join them right to left. In either case, you might need to change the direction of the join to make sure your query includes the correct information. The join direction can affect which information your query retrieves.
To understand what this means, consider the query we're designing. For our query, we need to see customers who have placed orders, so we've included the Customers table and the Orders table. Let's take a look at some of the data contained in these tables.
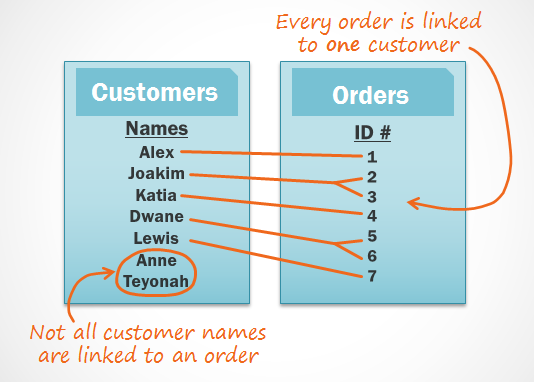
What do you notice when you look at these lists? First of all, every single order in the Orders table is linked to someone in the Customers table—the customer who placed that order. However, when you look at the Customers table, you'll see that the customers who've placed multiple orders are linked to more than one order, and those who've never placed an order are linked to no orders. As you can see, even when two tables are linked it's possible to have records in one table that have no relationship to any record in the other table.
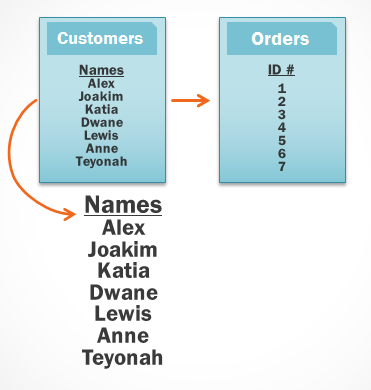
So what happens when Access tries to run our query with the current join, left to right? It pulls every record from the table to the left: our Customers table.
It then retrieves every record from the right table that has a relationship with a record Access has already taken from the left table.
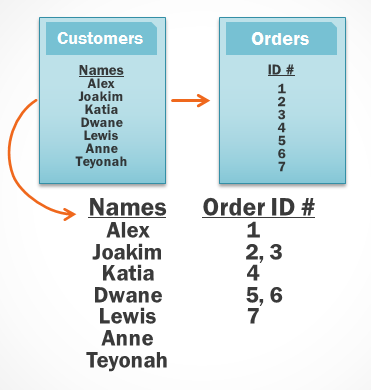
Because our join began with the Customers table, our query will include records for all of our customers, including those who've never placed orders. This is more information than we need. We only want to see records for customers who have placed orders.
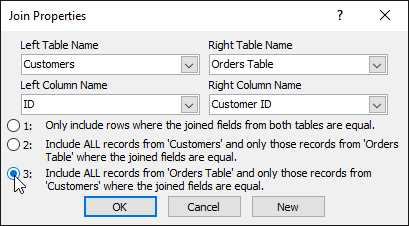
Fortunately, we can fix this problem by changing the direction of the join line. If we join the tables from right to left instead, Access will first retrieve the orders from the right table, our Orders table:
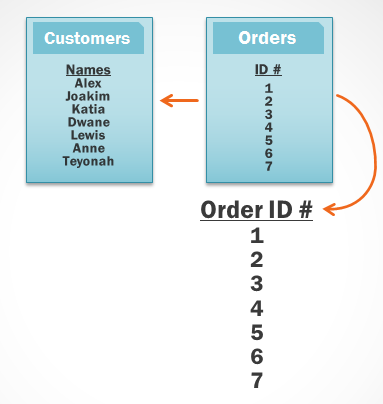
Then Access will look at the left table and retrieve only the records of customers who are linked to an order on the right.
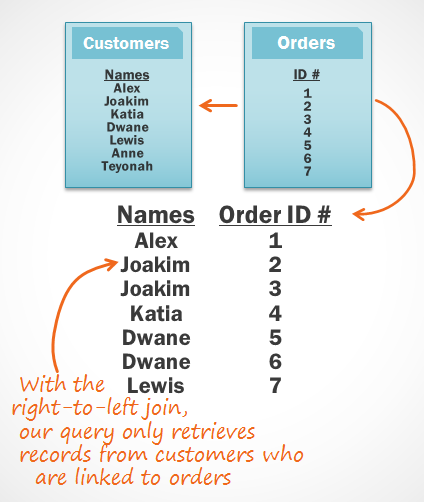
We now have exactly the information we want: all of the customers who have placed an order, and only those customers. As you can see, we had to join our tables in the correct direction to obtain the information we wanted.
Now that we understand which join direction we need to use, we're ready to build our query!
In our query, we needed to use the right-to-left join, but the correct join direction for the tables in your queries will depend on what information you want to see and where that information is stored. When you add tables to a query, Access will automatically join the tables for you, but it often doesn't join them in the correct direction. This is why it's important to always review the joins between your tables before you build a query.
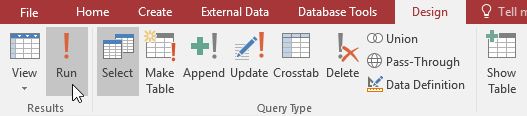
Now that we've planned our query, we're ready to design and run it. If you have created written plans for your query, be sure to reference them often throughout the query design process.
Now you know how to create a multi-table query. In the next lesson, we'll talk about more query design options that can make your query even more powerful.
/en/access2016/more-query-design-options/content/