Lesson 17: Printing a Report
/en/access2000/creating-a-report/content/
Introduction
By the end of this lesson, you should be able to:
- Open an existing report
- Preview a report
- Print a report
Opening an existing report
In the previous lesson, you learned how to create a report.
To open an existing report:
- Open the database window. Choose Reports from the Objects palette.

- Select an existing report and click the Preview button, or double-click the existing report.
Using Print Preview
When your report opens in Print Preview, your report is usually displayed at 100 percent. However, to get a better look at various report features, you may need to resize your window.

To view a report using the Print Preview toolbar:
- In Print Preview, your mouse pointer is the zoom tool (magnifying glass), which allows you to zoom in and out. Click the document (or the zoom button on the toolbar) to zoom in for a closer look. Notice Print Preview's drop down menu reads 100%.
- Click the document (or the zoom button) to fit it within the Print Preview window.
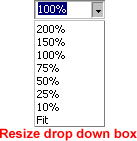
- Use the resize drop-down menu to further resize your document.

- Use the display buttons to display one or more pages.


- Click the database window button to bring the database window to front.
- Click the office links button to Publish It with MS Word or Analyze it with MS Excel. Clicking either of these choices prints your document as a Word or Excel document.

- For help, click the question mark.
- Click Close to close your report and return to the database window.
Challenge!
- Open, preview, and print an existing report.


 Print from the menu bar to open the Print dialog box.
 Print Preview and Print are fully explained in our Office 2000 tutorial.